Initial Configuration
Prerequisites
As well as being licensed for Agent, an Agent-specific Service Account will need to be created, and this can be done by navigating to Admin -> Service Accounts, where you will see a list of active service accounts in Paygate.

Clicking on the “Create Service Account” button will present the user with the screen to create a new service account:

Select “Agent” from the “Type” dropdown, and click the “Save” button, and a Service Account will be configured in the system.
Agent Initialisation Key
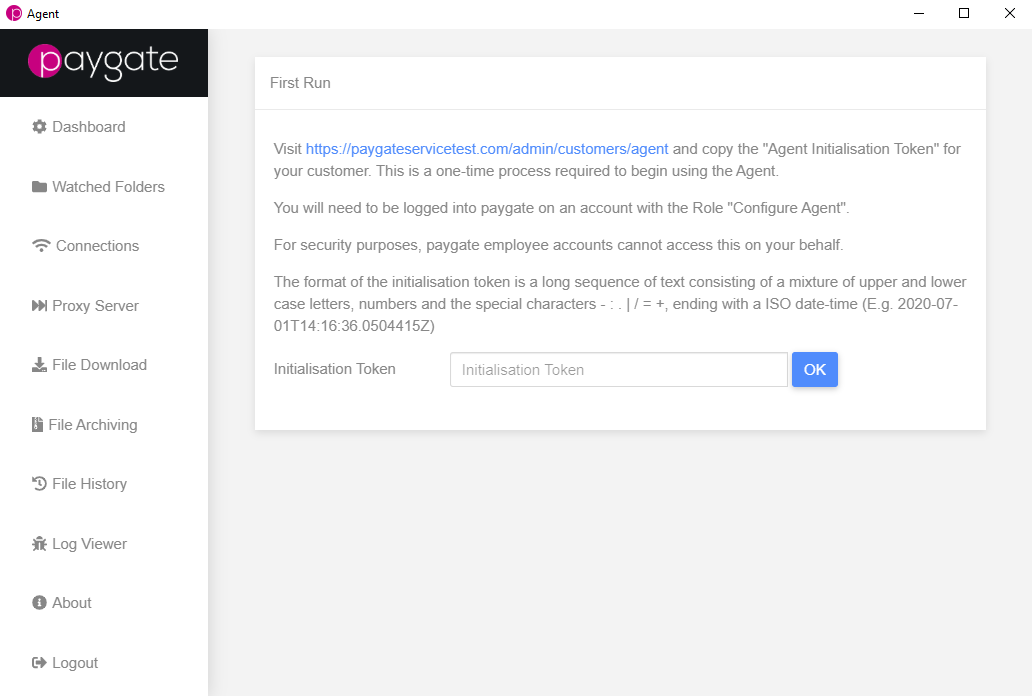
When you first run the Agent, after a new installation, the Agent will be in an First Run mode. In First Run mode, the client asks you to enter an ‘Initialisation Token’ before allowing you to continue.
The Initialisation Token is a generated code that Paygate uses to identify individual customers, and is needed in order for Agent to function.
Visit https://app.paygateservice.com/admin/customers/agent and copy the “Agent Initialisation Token” for your customer. This is a one-time process required to begin using the Agent.
You will need to be logged into Paygate on an account with the Role: “Configure Agent”. For security purposes, Paygate employee accounts cannot access this on your behalf.
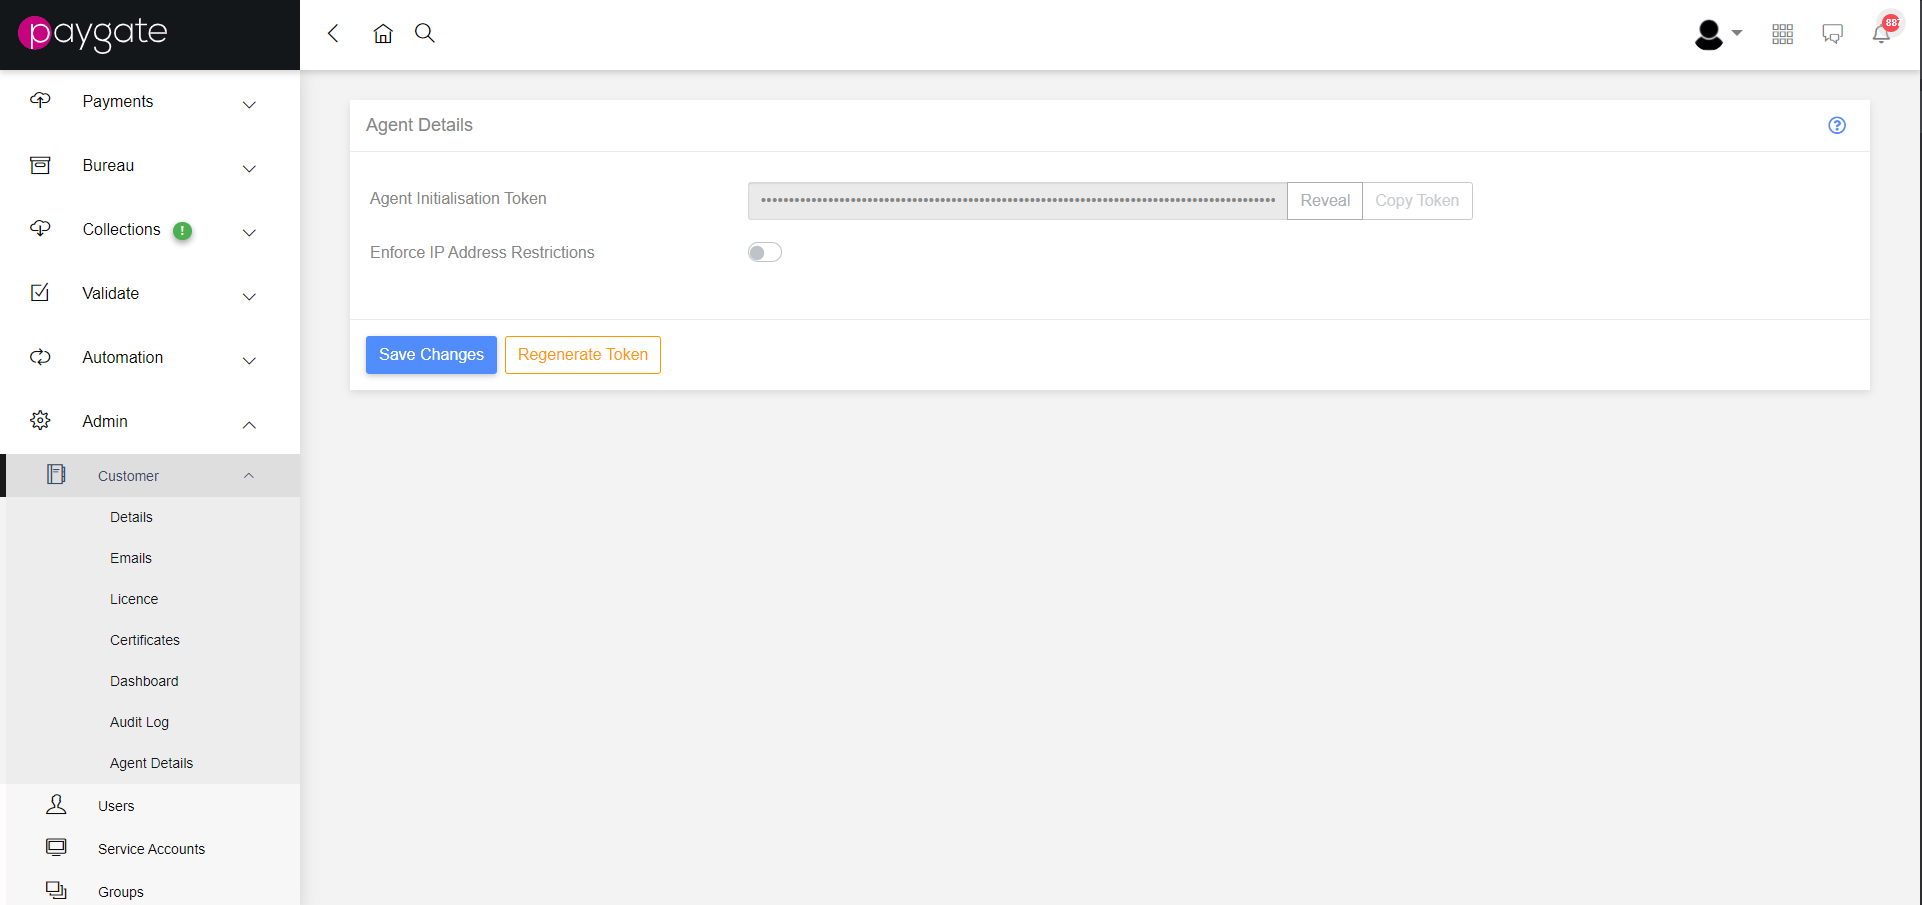
The format of the Initialisation Token is a long sequence of text consisting of a mixture of upper and lower case letters, numbers and the special characters - : . | / = +, ending with an ISO date-time (E.g. 2020-07-01T14:16:36.0504415Z).
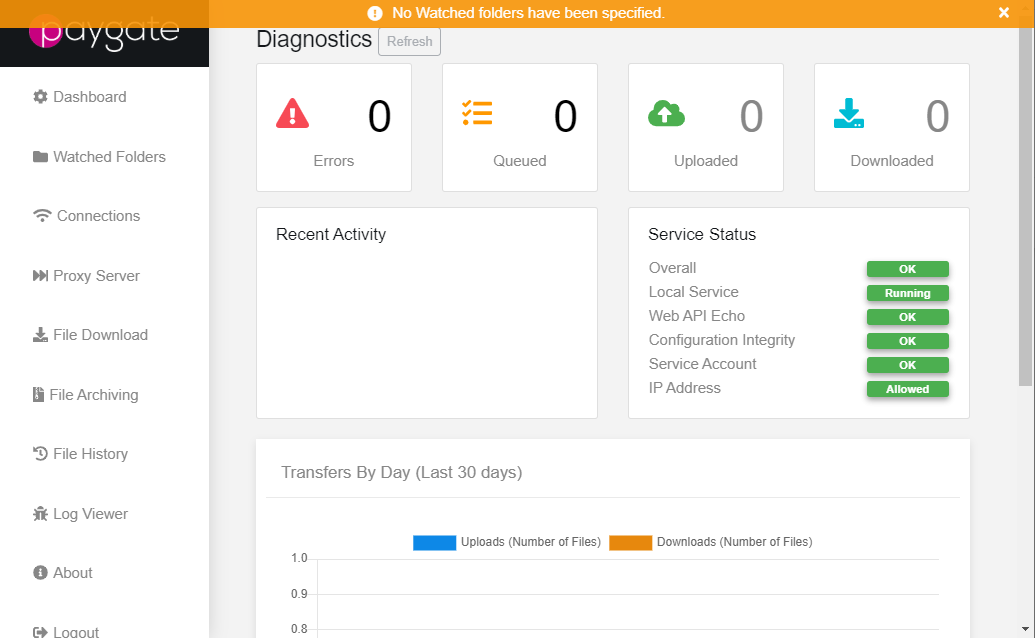
Once the Initialisation Token has been entered, the user will be presented with the home dashboard. By default no watched folders will have been configured (shown by notification on the page).
Note the Service Status indicator on the right hand side of the page. There are several indicators that show whether the service is running successfully. Once folders have been configured, the correctly configured dashboard should match the image below.

Error States
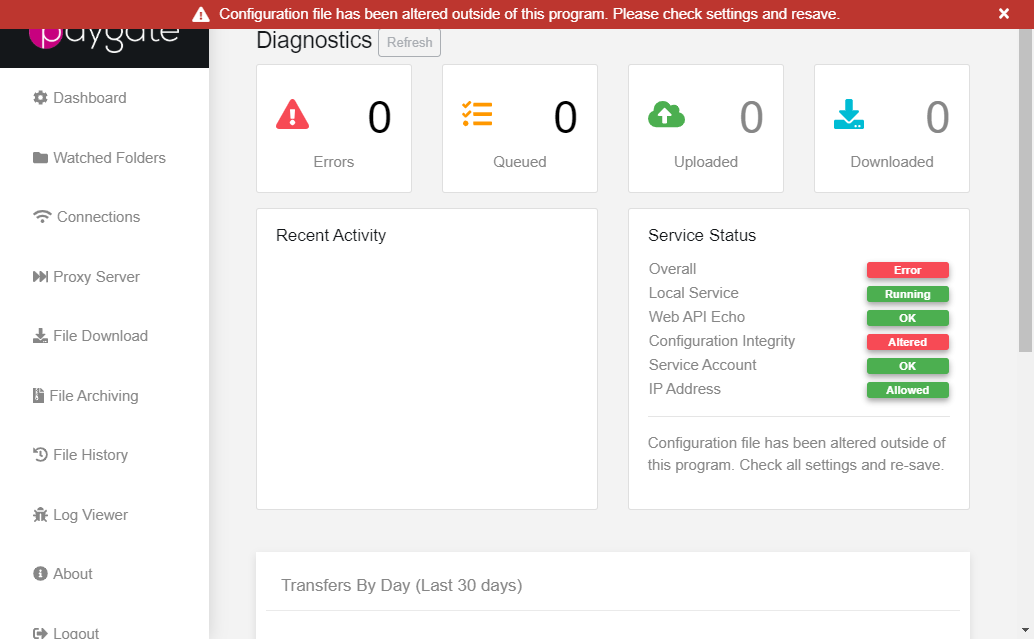
Shown above is how the dashboard will show that the current configuration does not match the expected configuration, indicating that changes have been made to the configuration database outside of Agent. To fix this, ensure that the configuration settings are correct and save the settings again.
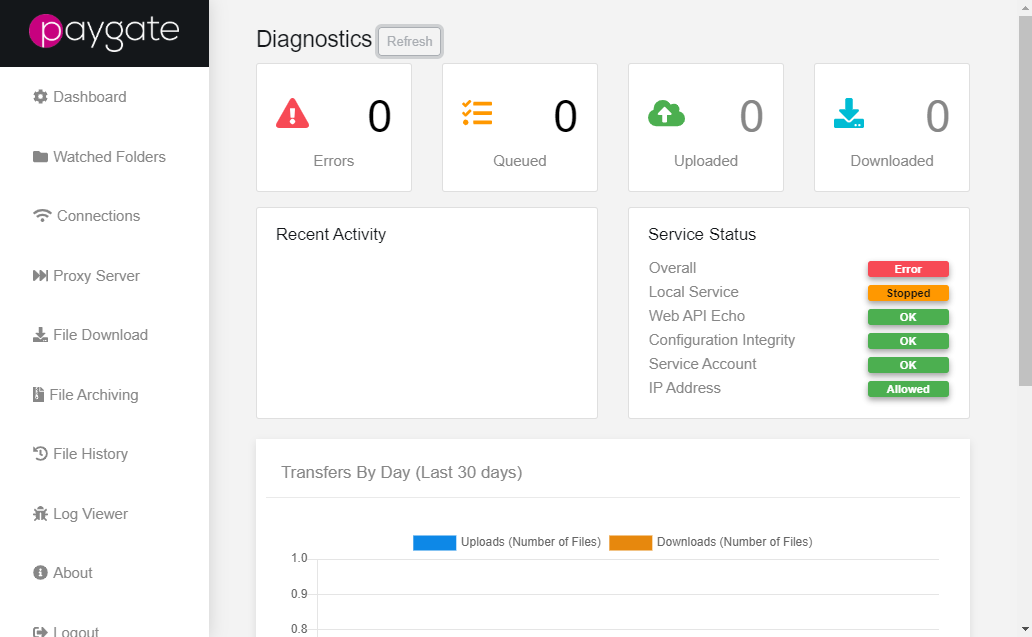
Shown above is how the dashboard will indicate that it cannot communicate with Paygate. If this error occurs, check that the network connection on the user machine is configured correctly, and if the issue persists, contact Paygate Support.
Initial Settings
By default, the Agent will be able to connect to Paygate without any additional configuration, although it is possible to configure the Agent to go through a proxy or transfer data using secure FTP.
Configuration Client proxy settings
The Agent configuration client requires a web connection to log in, and it is possible that a proxy server will need to be used to open the client. Typically, when a user tries to open the configuration client on a machine that doesn’t have external web access, they will be presented with a blank screen, instead of the login screen.
A proxy can be configured by placing a file named proxy.txt into the configuration folder:
C:\ProgramData\PaygateEnterprise\cfg
Inside the proxy.txt file, type the URL and port (if required) of the proxy server that needs to be accessed to reach an external web address, i.e:
127.0.0.1:8042
Reopening the configuration client will present the user with the typical login screen if the proxy details are correct.
