Create User
Overview
You should fill in all the details about the user you’re creating on this page
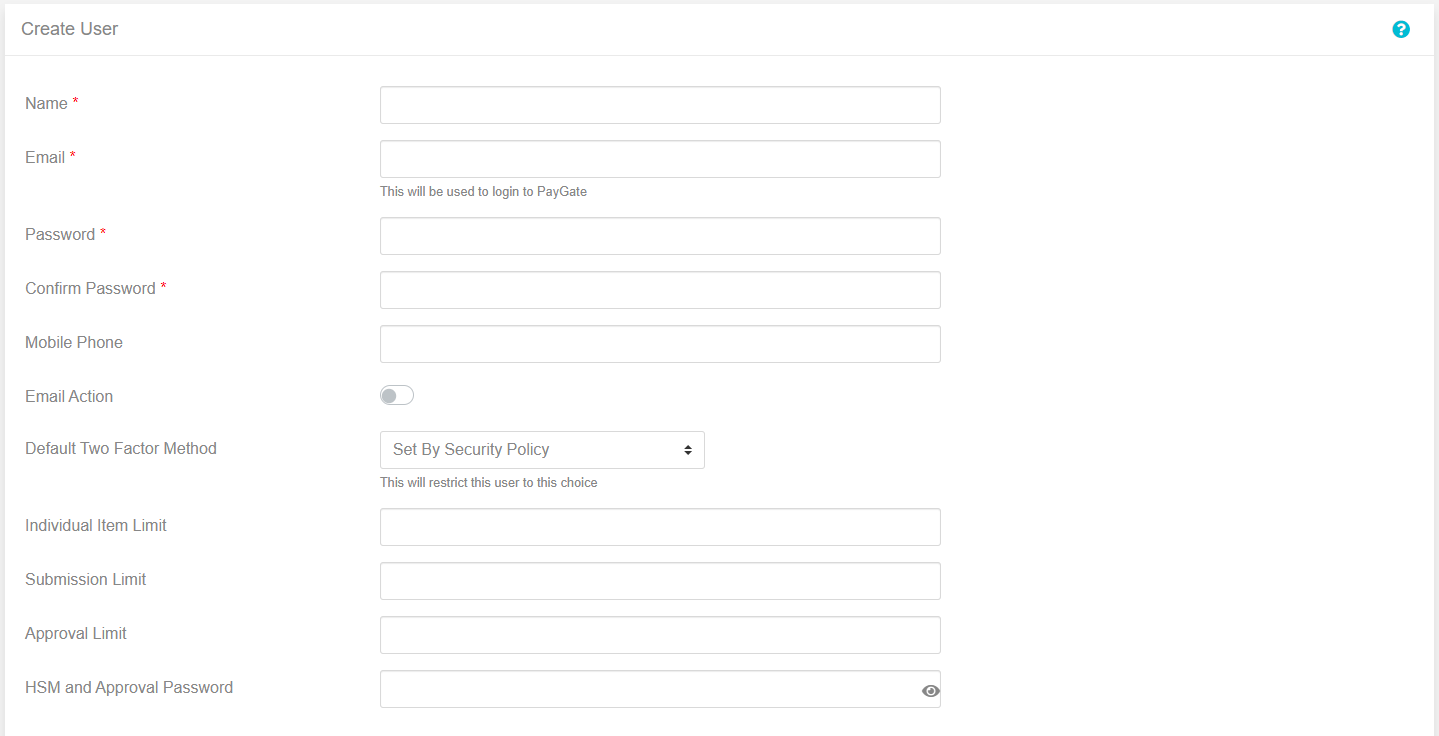
The fields are as followed
| Field Name | Usage | Required |
|---|---|---|
| Name | This should be set to the users name, first and/or last is up to you | Yes |
| This should be the users email, it will also be used to login to the system | Yes | |
| Password | This will be the initial password they use to login | Yes |
| Confirm Password | This should be set to the same as password, it’s there to make sure that the password is set to what you want and there hasn’t been a mistake in typing | Yes |
| Mobile Phone | This should be the users phone number | No |
| Email Action | This will toggle it they are sent emails for each action | No |
| Default Two Factor Method | You can override the two factor options set in the security policy on an individual user basis | No |
| Individual Item Limit | This will limit the amount a user can process on an individual item basis, leaving empty means unlimited | No |
| Submission Item Limit | This will limit the amount a user can process per submission leaving empty means unlimited | No |
| Approval Limit | This will limit the amount a user can approve per payment leaving empty means unlimited | No |
| HSM and Approval Password | This is the password the user has for the HSM and approval password when approving actions, to use this it can either be selected as the Default Two Factor Method, in the security policy, or per group | No |
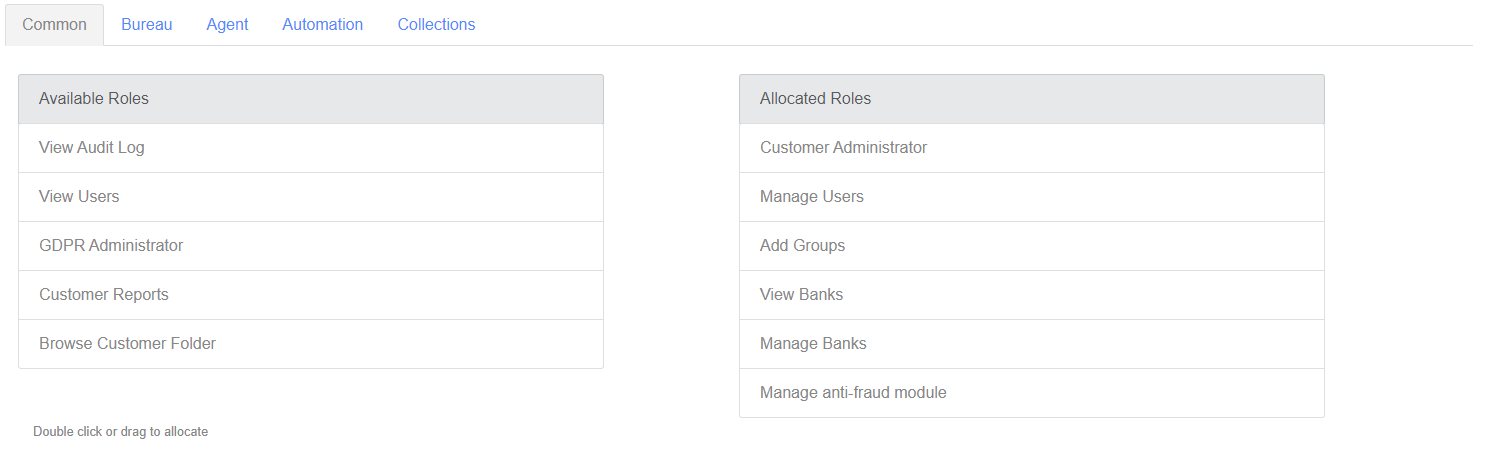
The final section on this page is for roles, you can assign a role to the user by either double clicking or dragging the role to the “Allocated Roles” section. There are different tabs to split up the different sections of Paygate
To see a full list of roles, you can look at roles