Tutorial - Pre-processing
Overview
In this tutorial we’re going to create an importer that can read a non standard file. The file we will read is an example of a Standard18 file that is often created by finance software packages. Pure Standard18 is a difficult file format because it is not truly fixed length and has a header and a footer. True standard18 cannot be read natively into a mapping but by using the pre-processing tools in Paygate we can easily read the file and make use of the data in a mapping or workflow.
Prerequisites
There are a few prerequisites for building this mapping:
1 - Access to Paygate - obviously 2 - The sample file that we are going to map. Download it from here 3 - A Paygate user account with the following user roles: View Mapping, Manage mapping, Execute Mapping.
Step 2 - Inspect the file.
The first thing we want to do is inspect the file we want to map. Opening up the file in notepad or Notepad++ we can se several ‘issues’ with the file:
- The file is one continuous stream of text with no line breaks.
- The file has a Header and Footer
- one of the data line is actually a Contra line (In important part of a BACS file but we want to ignore it as it’s no a payment)
Before we can use the file in Paygate we will want to deal with all of these issues. Fortunately, pre-processing is going to make fixing the file easy.
Step 2 - The Importer.
As with all mappings, we need to start with an importer that will read the file and import the data into the mapping engine. We have two choices:
- Delimited
- Fixed Length
It its current state the file is neither delimited or Fixed length. It is closer to a fixed length file though and so we intend to use pre-processing to ‘convert’ the file into fixed length so that it can be read using a fixed length importer.
Create a new Fixed Length Importer. Automation > Mapping > Importers. Click ‘New Importer’ Select ‘Fixed Length’ Give the new importer a title. ‘S18 Importer’
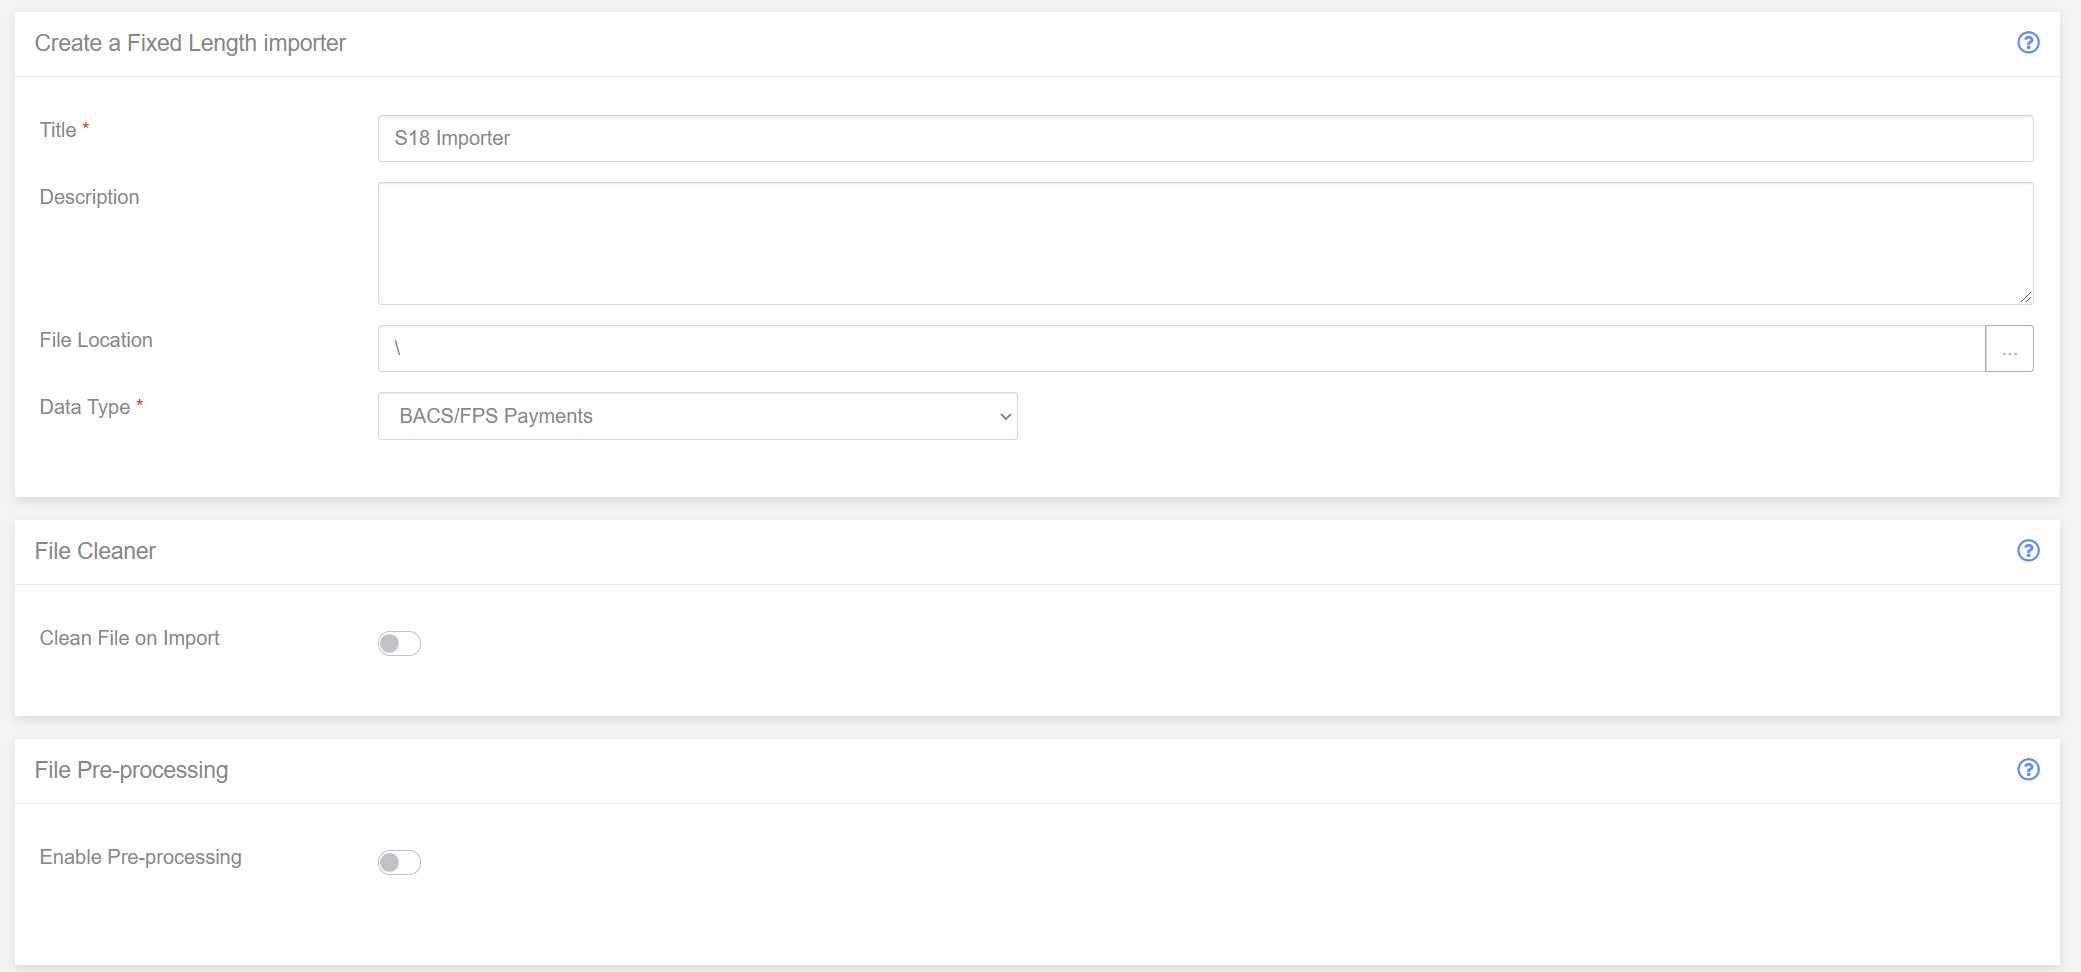
Add a description if you want to and keep the File Location as the default and since we are creating an import for BACS submissions, we will keep the ‘Data Type’ as the default.
Enable Pre-Processing
Normally, in a fixed length mapping, we would start telling the importer how to read the file and assign the various data items to BACS data types. However the file isn’t ready for that yet - it isn’t in a useable format to make use. To make the file useable we will use Pre-Processing to reformat the file into a structure that can be used in the column section.
Find the ‘File Pre-Processing’ panel and click the ‘Enabled Pre-Processing’ to enable.

Pre-processing consists of a number of ‘rules’ that are chained together in any order. In the file inspection stage above we identified the problem with the file that we has to fix. We can write down a list of tasks we want to carry out in pre-processing:
- Remove the Header
- Remove the Footer
- Split the data into separate rows
- Remove the contra data record.
Now we have identified the task we can start building the chain of Pre-Processing rules.
Task 1 - Remove the header
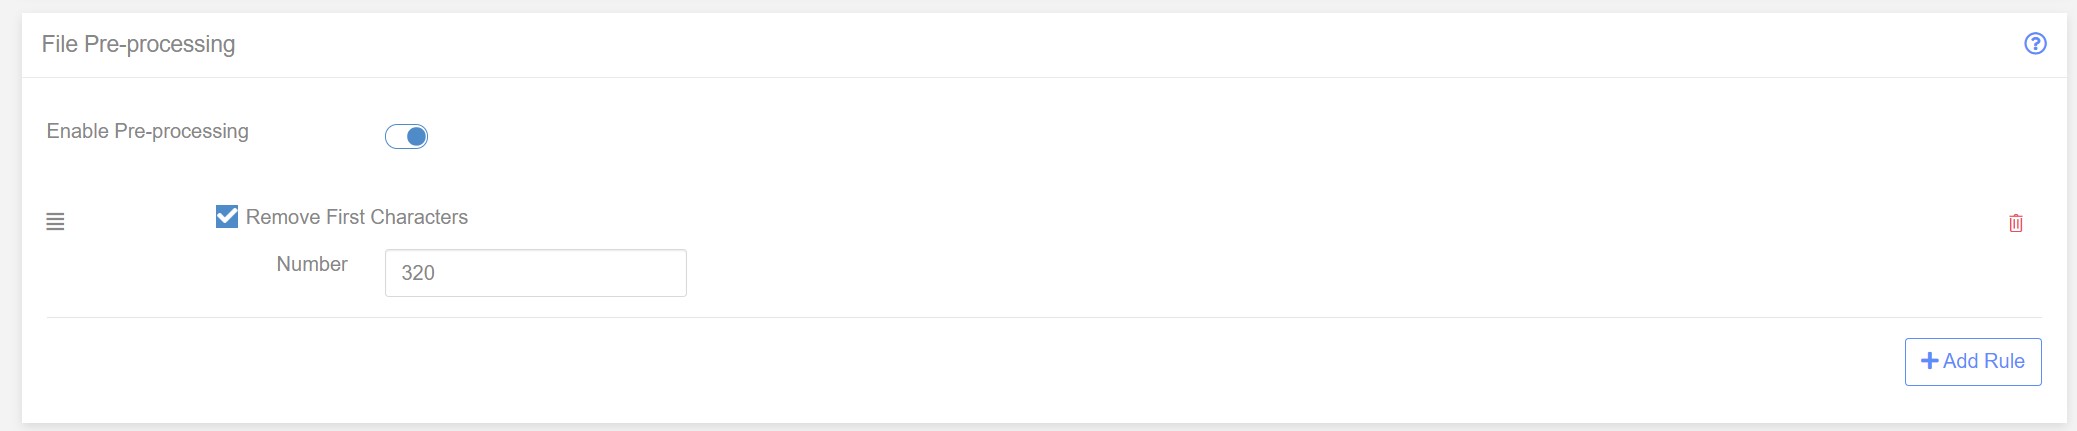
Before we get the the payment records in our file we see that there is a header section. We know the file is standard18 and so we therefore know that the head is always the same length - 320 characters.
All we need to do to remove the header is chop off the first 32q0 characters of the file. Fortunately we have a pre-processor rule that can easily do this - ‘Remove First Characters’.
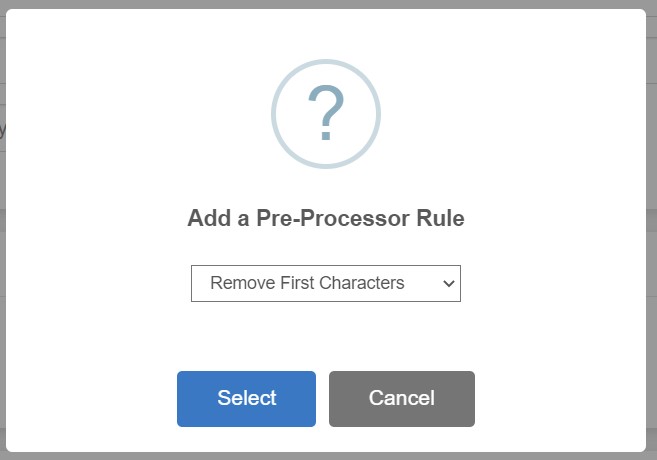
Click ‘Add Rule’ and select ‘Remove First Characters’.
The new rule will be added to the Pre-Processing ‘chain’. Change the number to 320 to remove the first 320 characters.
Task 2 - Remove the Footer
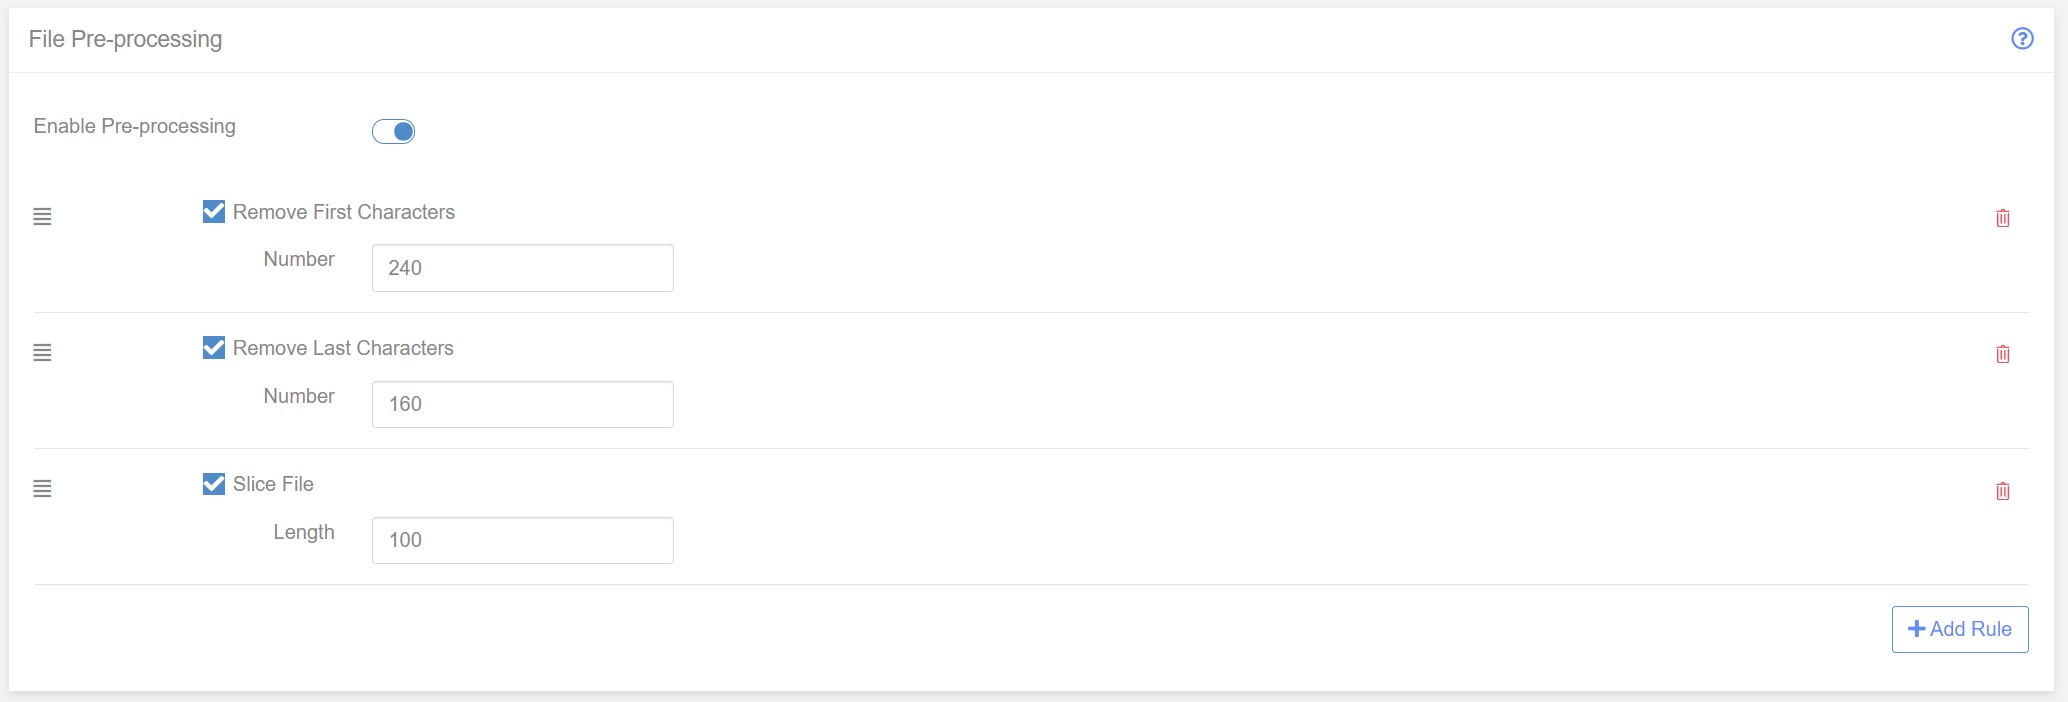
The file also contains a footer of 240 characters. We can use the ‘Remove Last Characters’ to remove the footer. Click ‘Add Rule’ and choose ‘remove Last Characters’. This will add the rule to the bottom of the pre-processing chain.
Task 3 - Split the data into separate rows
The next task is a little bit more in-depth than simply removing text from the start and end of the file. With the header and footer removed we are left with just the payment lines in the file.
Because the file is standard18, there are no line breaks between the payment items. In order for the mapping engine to process each payment line we will need to add the ;line breaks ourselves. Fortunately this is easy to do using pre-processing.
To split the payments into individual lines we use a pre-processing rule called ‘Slice File’. What this rule does is split a long row of text into separate lines - all with a specific length. For example, say you had the following line of text:
AAAAAAAAAABBBBBBBBBBCCCCCCCCCCDDDDDDDDDD
If we used a ‘Slice file’ rule on this line using a length of ‘10’ we would end up with a file that contained:
AAAAAAAAAA
BBBBBBBBBB
CCCCCCCCCC
DDDDDDDDDD
Now we know that in our standard 18 the payment lines are exactly 100 characters long. So all we need to do is add a ‘Slice File’ rule with length 100 and the individual payments will be split into separate lines.
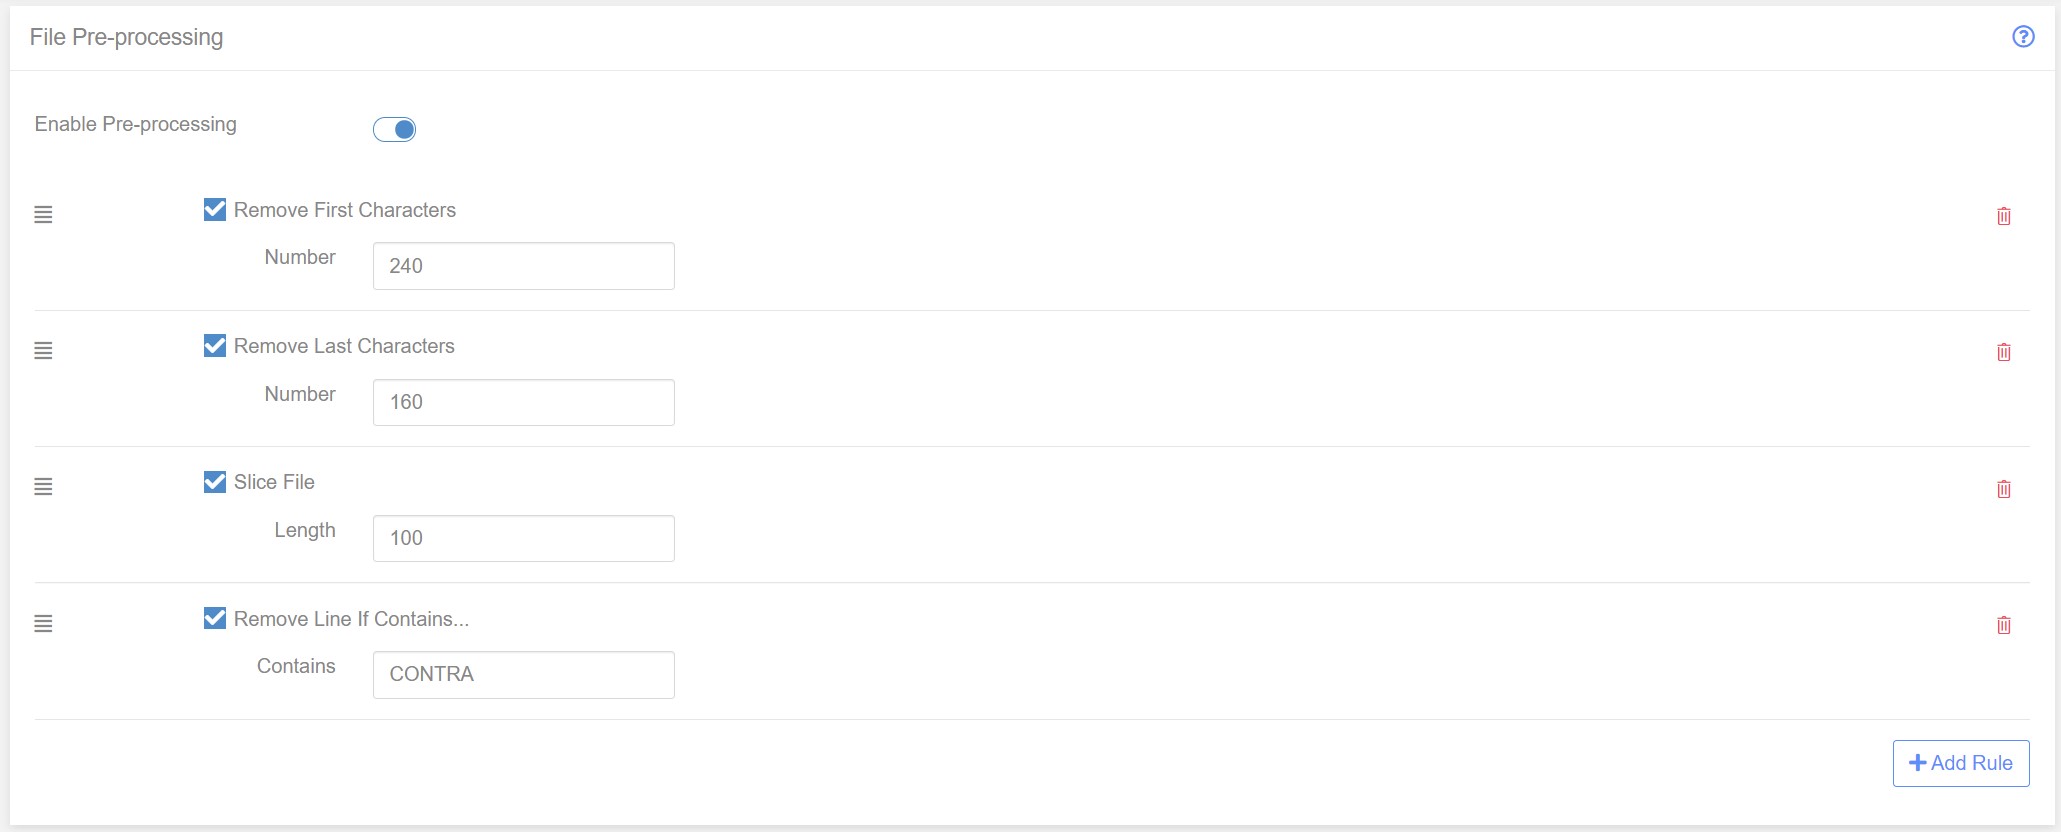
The pre-processor rule chain now looks like this:
The pre-processing is now complete. We have successfully convert the incoming Stand18 file, on-the-fly, to a format that we can work with. The last fob is to tell the importer how to read the split lines.
Task 6 - Remove Contras
Now that the payment lines have been successful split into separate line we could go ahead and start reading the data. But there’s still one more task to do. Standard18 line contain one or more ‘special’ lines that are not actually transactions (credit’s or debits). These special lines are known as Contras and they are used by Real-time gross settlement systems like BACS to balance the movement of funds between accounts.
We want to remove these line from the file before we import the data into a mapping.
To remove contras we use the fact that contra line always have the word CONTRA at a specific location in the line - position 65. If the word CONTRA appears in the location we assume it is a contra and remove the line.
The is a pre-processing rule that can help here. It’s called ‘Remove Line if Contains’. As the name suggest, this rule will remove any line that contains a specific fragment of text. Note, the whole line is remove and not just the matching text.
We had to slice the file before running this rule, otherwise all of the payments would be removed as they were in a single line prior to slicing.
Task 5 - Columns
As the names suggests, Standard18 is a stand. The position of each data item within the fixed length data is always in the same position.
Our final job is to add in the positions within each line of the separate data items. For example, the data between positions 1 and 6 are always the Third-Party sortcode.
Fill in the column data as shown in the diagram below:
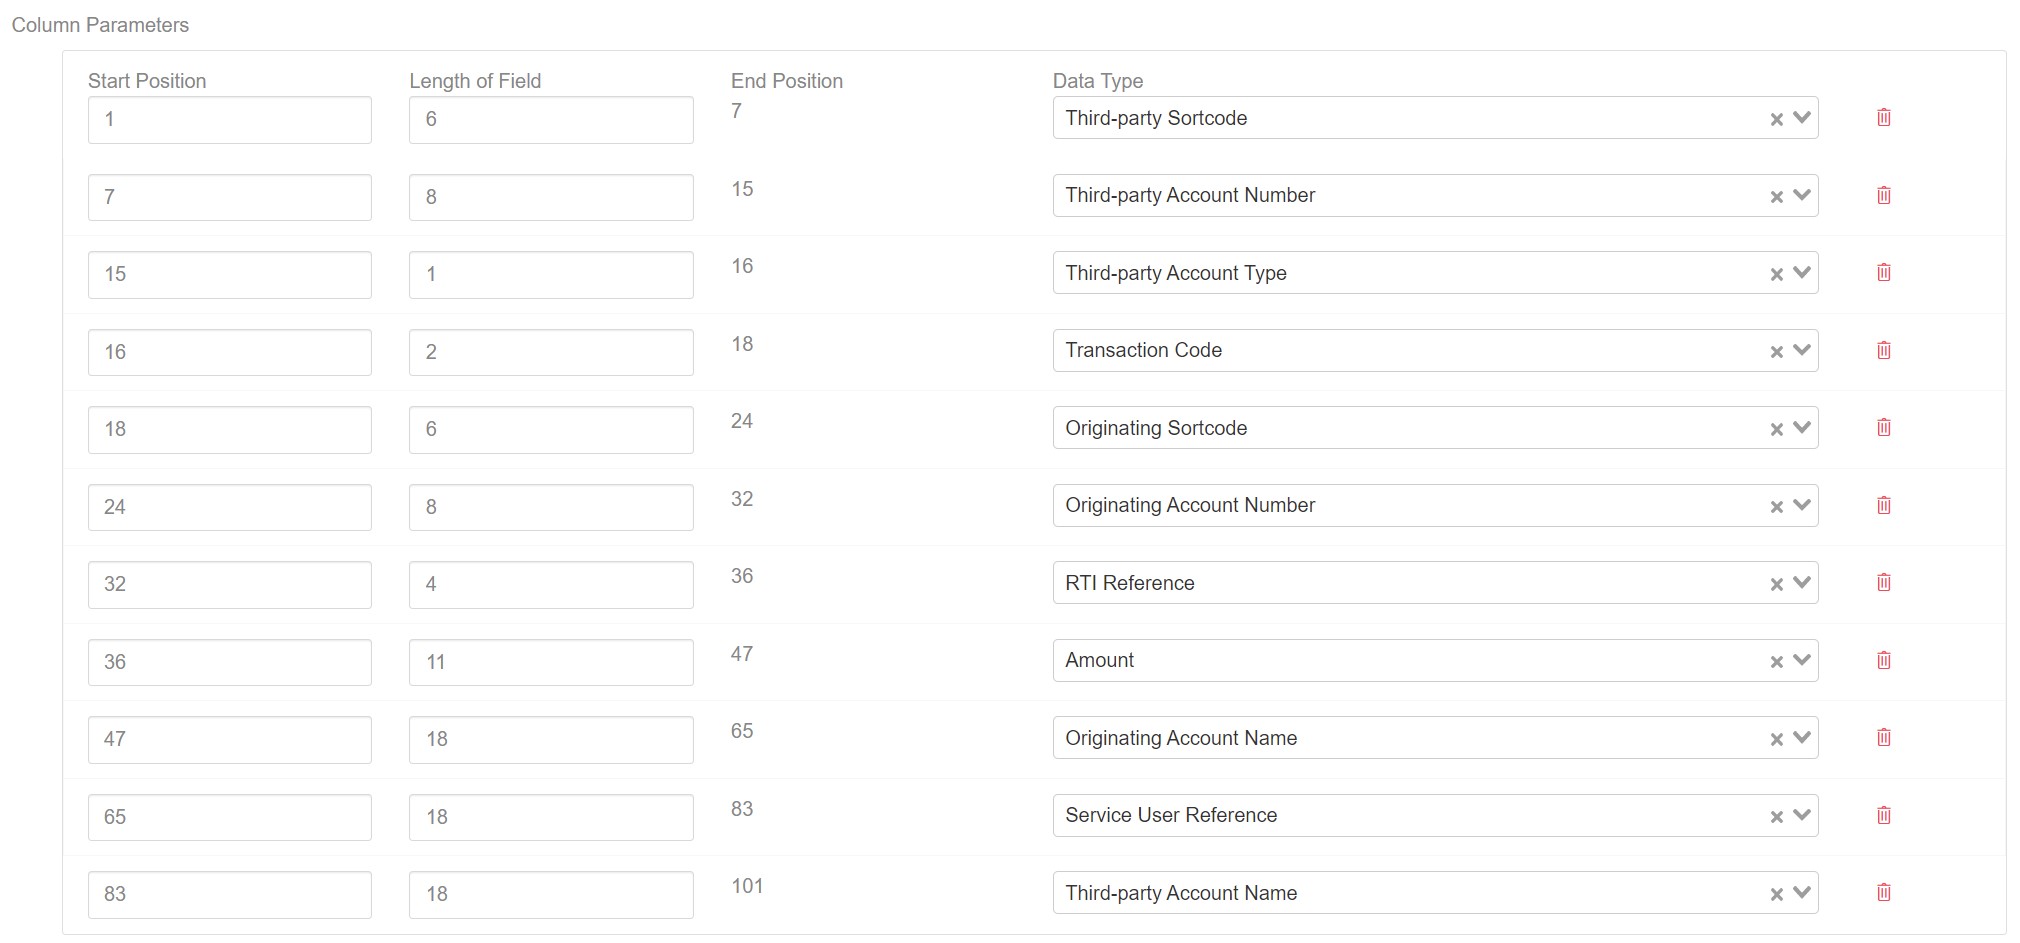
The importer configuration is now complete and can can saved. Click the save button to save the importer to Paygate.
The importer can be added to a mapping and used to read Standard18 files from any source.