Send Submission
You can access a send action via the Action List.
Alternatively, if you approve a submission and have the “Send” group role, the send action will be automatically displayed after the submission has been approved.
Login to Vocalink
First you need to login to Vocalink in order to send the submission to them.
NB. Vocalink process the submissions for BACS and Barclays faster payments.
Click “Login” to begin the login process.
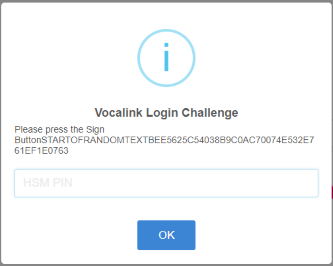
Vocalink will send a login “challenge” which needs to be signed either with an HSM or a smartcard. The process is similar for either signing method.
If the group linked to the submission used an HSM to sign the submission Standard18 then an HSM will also be required to sign the login “challenge”.
Similarly, you will need to use a smartcard to sign the login “challenge” if a smartcard signed the Standard18.
Sign Login Challenge Using an HSM
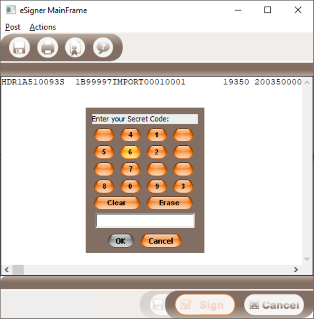
A group can be configured so an HSM PIN needs to be entered as part of the signing process. Each user has their own HSM PIN which needs to be configured by the Paygate administrator.
If a group doesn’t need the user to enter an HSM PIN, clicking the “Sign” button will sign the login challenge and log you into Vocalink.
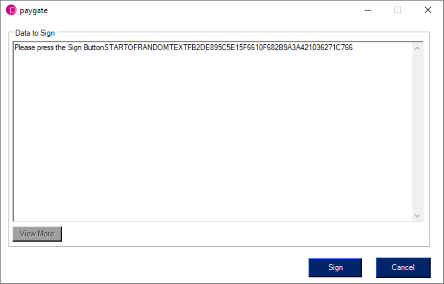
If a group requires an HSM PIN, the following dialog is shown after clicking the “Send Submission” button.
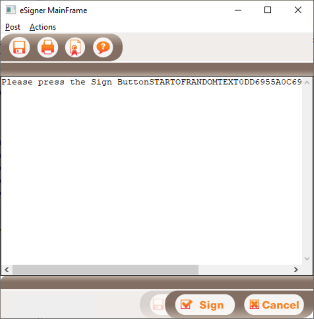
The screenshot below is when a HSM is needed to sign the login “challenge” and when the user needs to enter an HSM PIN.
Sign Login Challenge Using a Smartcard with eSigner
This assumes you have installed eSigner by Gemalto which will have been provided by your bank. Click “Sign Submission” to display the eSigner signing window.
Click the “Sign” button to display a PIN entry window. The exact display will depend on your eSigner settings.
Now enter your smartcard PIN and click “OK”.
Sign Login Challenge Using a Smartcard with the Paygate plugin
There are two versions of the Paygate plugin, one for Internet Explorer and one which works with Chrome and Firefox. Clicking the “Sign Submission” button will display the submission data in a dialog window as shown below.
Clicking the “Sign” button will show the PIN entry dialog as shown below. NB. It can take a few seconds for the PIN entry dialog to appear.

Now enter your smartcard PIN and click “OK”.
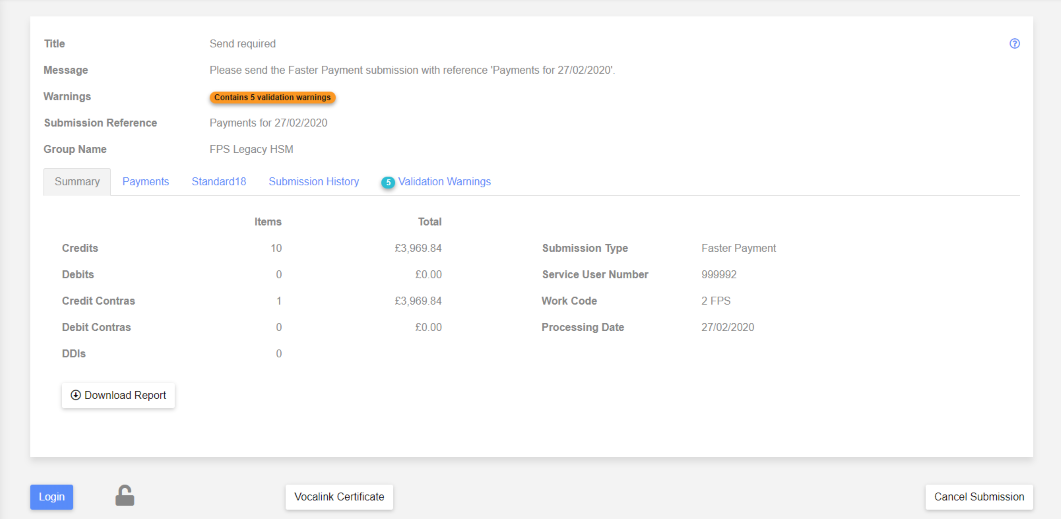
Send Submission
When logged into Vocalink the screen changes as shown below.
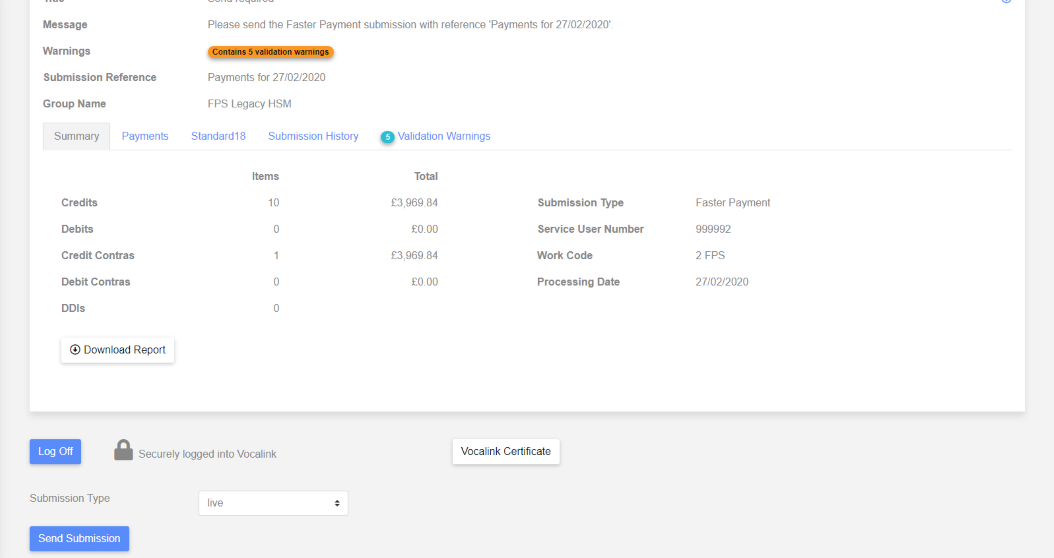
NB. The “Login” button has changed to “Log Off” and the padlock icon is closed along with the message confirming that you are “Securely logged into Vocalink”.
The “Submission Type” determines how the data is handled by Vocalink.
The default option is “live” meaning that the payments are processed as expected i.e. money is transferred between accounts.
The other options are for testing an initial submission to verify your Service User Number.
These test options just send the submission Standard18 data to Vocalink but the payments are not actually processed.
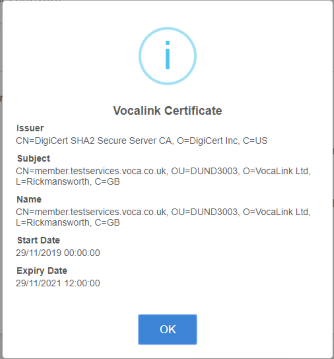
Click the “Vocalink Certificate” button to show details of the certificate at Vocalink.
Click the “Send Submission” button to start sending the submission data to Vocalink.
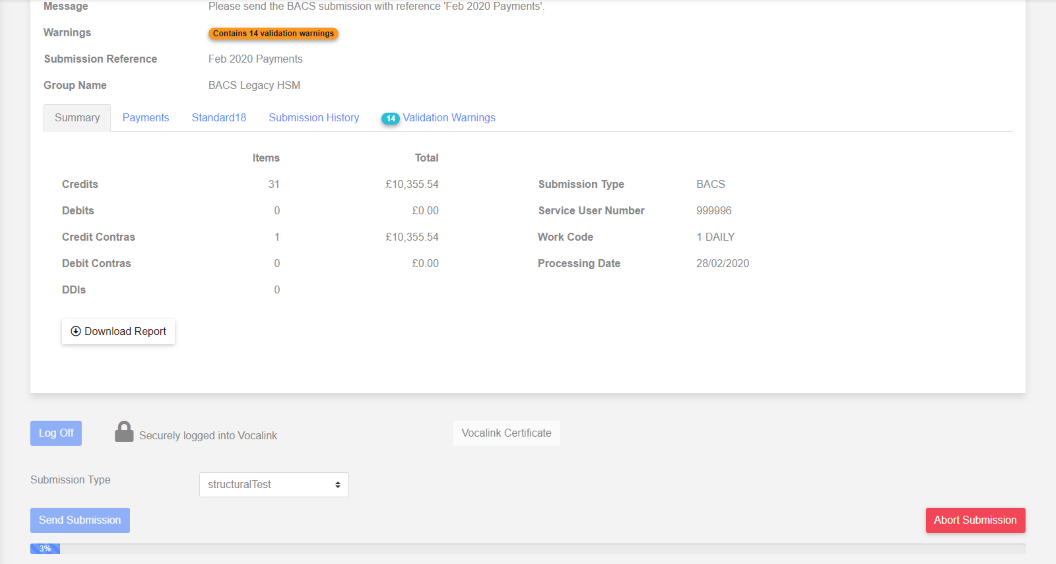
The “Abort Submission” button will stop the submission being sent.
You can always resend the data later.
A submission summary report is shown after successfully sending the data to Vocalink.
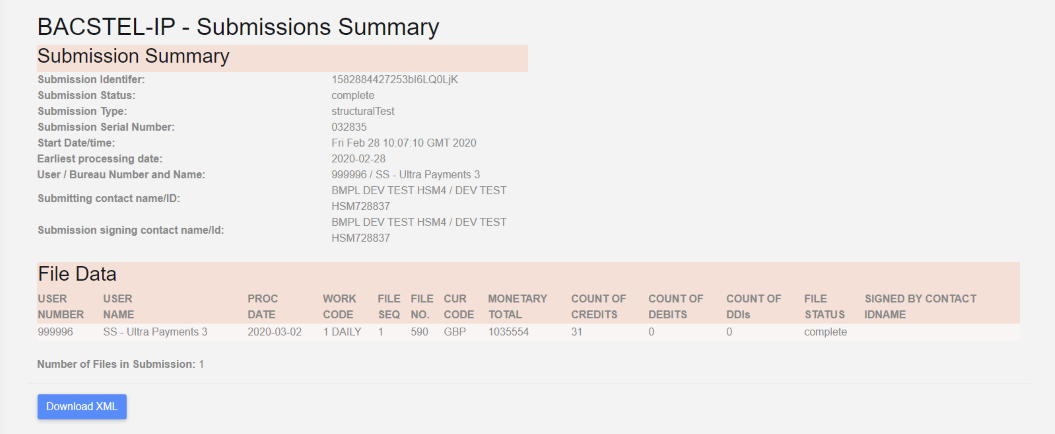
The report is derived from XML returned by Vocalink. Click “Download XML” if you need to save this XML. NB. You can also download the XML at a later date via the “Search Submissions” screen.