Paygate Plugin for Firefox
How to install the Paygate Plugin in PG3 via Firefox
This document details the process of installing the Paygate plugin in Paygate 3 via Firefox.
The Firefox plugin requires an additional web extension which is installed prior to the Paygate plugin as part of the Paygate plugin install process.
This installation guide is for existing Paygate Online users wanting to use Firefox for Paygate 3 and for new users to Paygate 3.
Installing via Smart Card Submission via Firefox
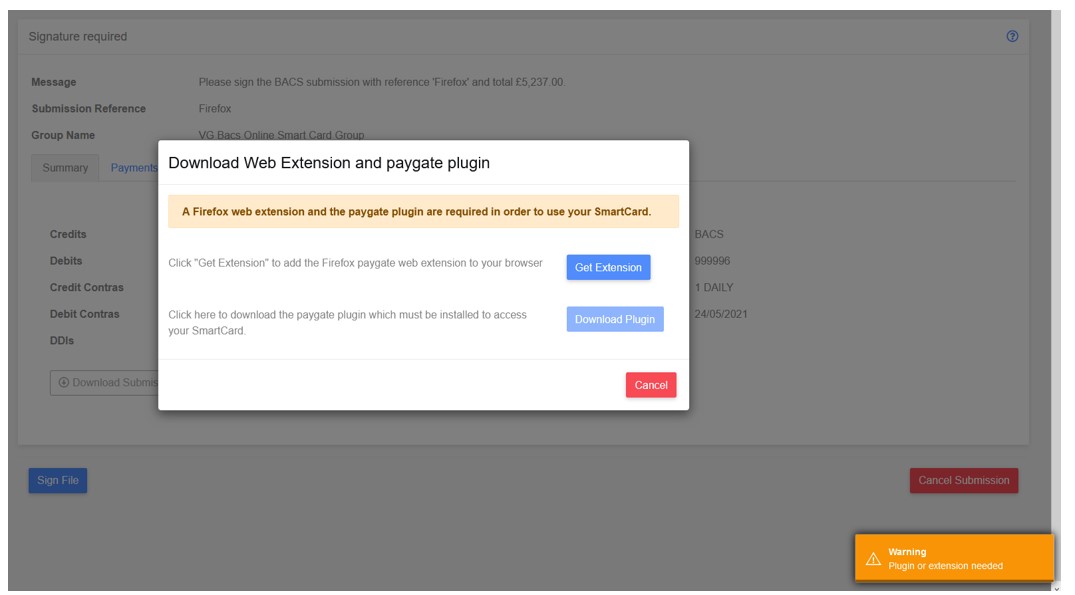
Log into the Paygate 3 application via Firefox. Process an Online Submission for a Smart Card Group to Signing stage.

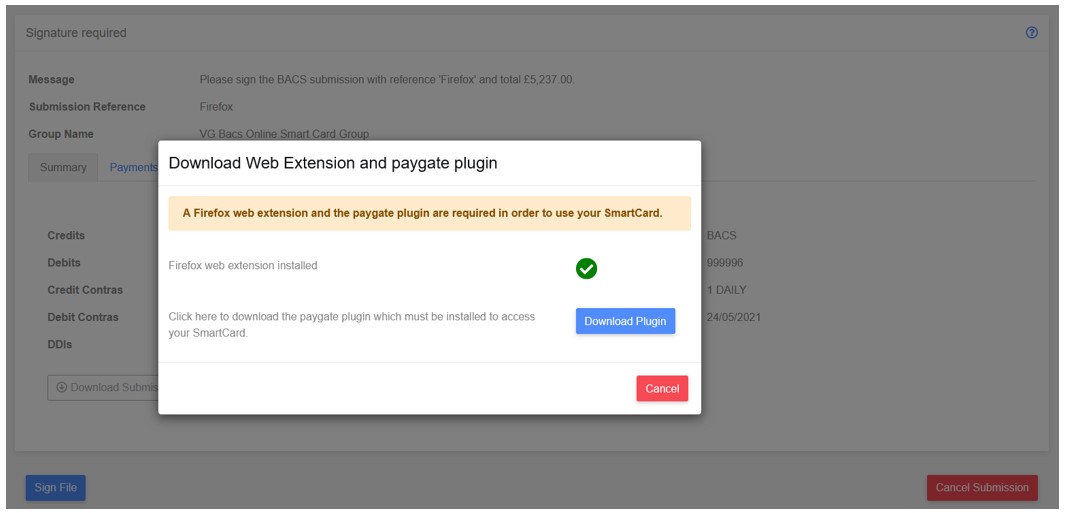
Within the Signing Action, click “Sign File”. An orange “Warning” toast with message “Plugin or extension needed” will be shown and the “Download Web Extension and Paygate plugin” dialog will be displayed. As the Firefox web extension needs to be installed prior to the Paygate plugin, the “Download Plugin” button will be disabled.
Click “Get Extension”. The “Firefox Browser ADD-ONS” will open in a new browser tab.
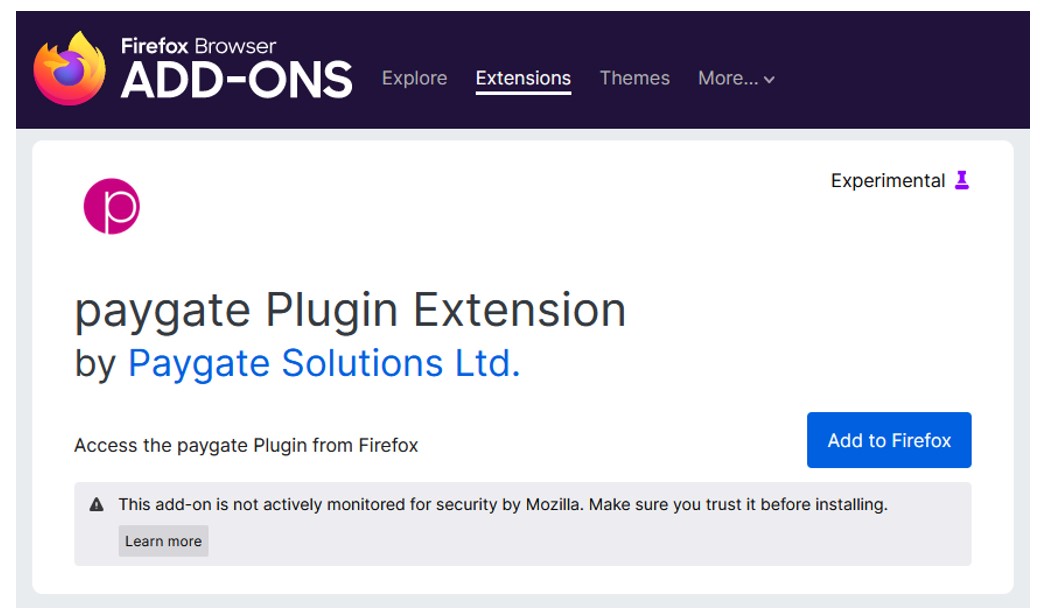
Click “Add to Firefox”. An “Add Paygate Extension for Firefox?” dialog will be displayed.
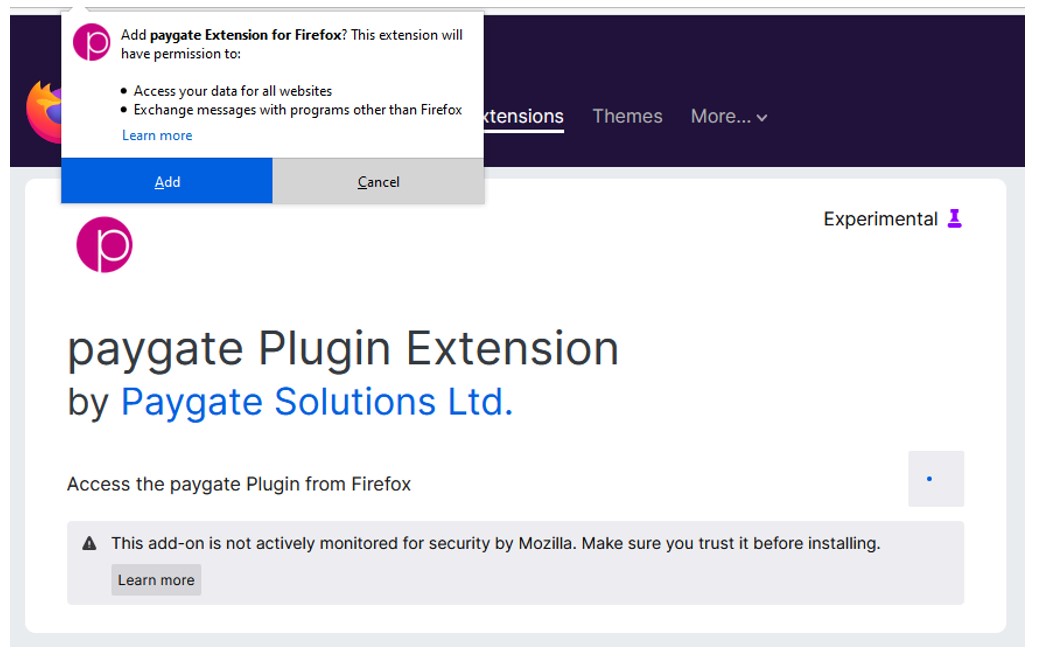
Click “Add”. A confirmation dialogue with message Paygate Extension for Firefox was added” will be displayed.
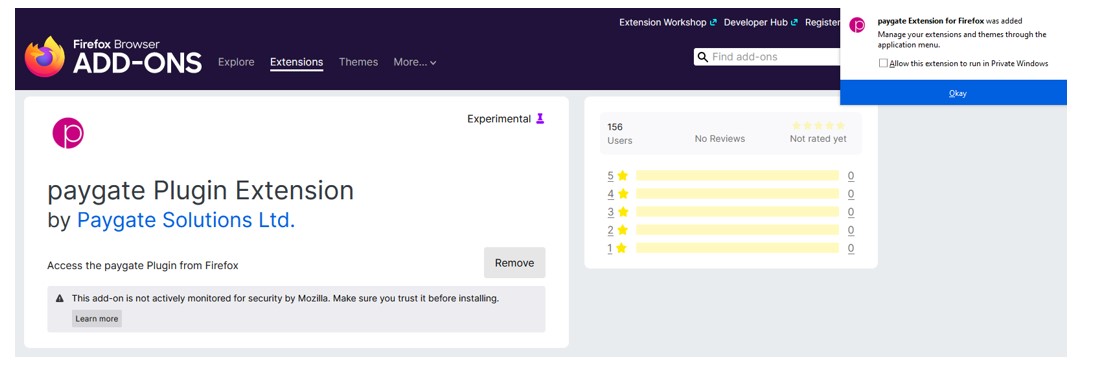
Click “Okay” and close the “Firefox Browser ADD-ONS” browser tab. Within “Download Web Extension and Paygate plugin” dialog, message “Firefox web extension installed” will be displayed alongside a green tick to show the Firefox web extension has been successfully installed and the “Download Plugin” button will become enabled.
Click “Download Plugin”. An additional install message will be displayed in the dialog and an msi download prompt will appear.
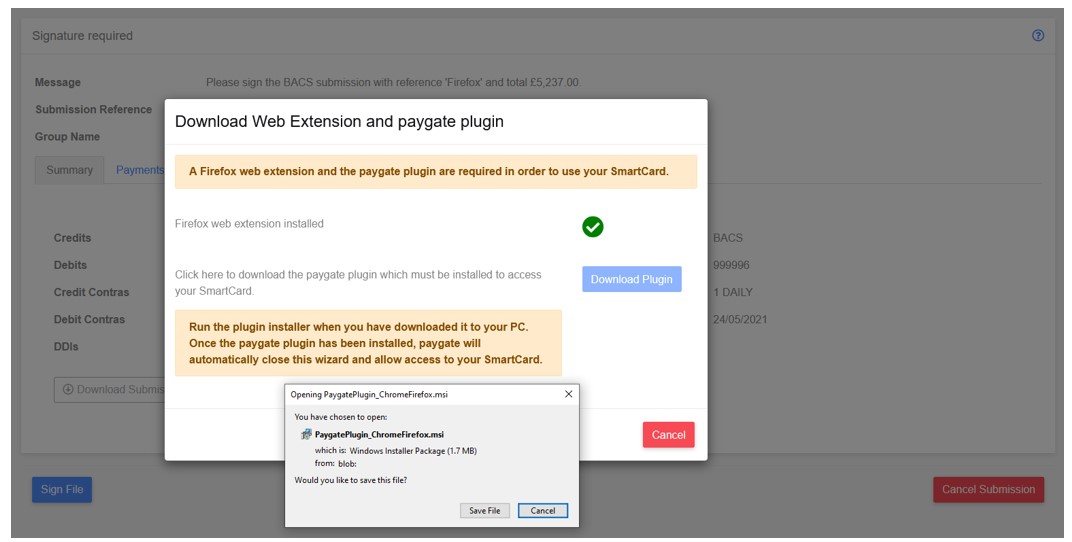
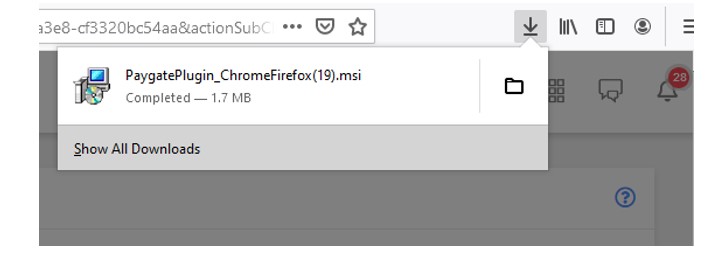
Click “Save File”. A blue download arrow will appear in the top right of the browser tab.

Click on the arrow. An msi download completed dialog will be shown.
Click on the msi download. An “Open Executable File?” dialog will appear.
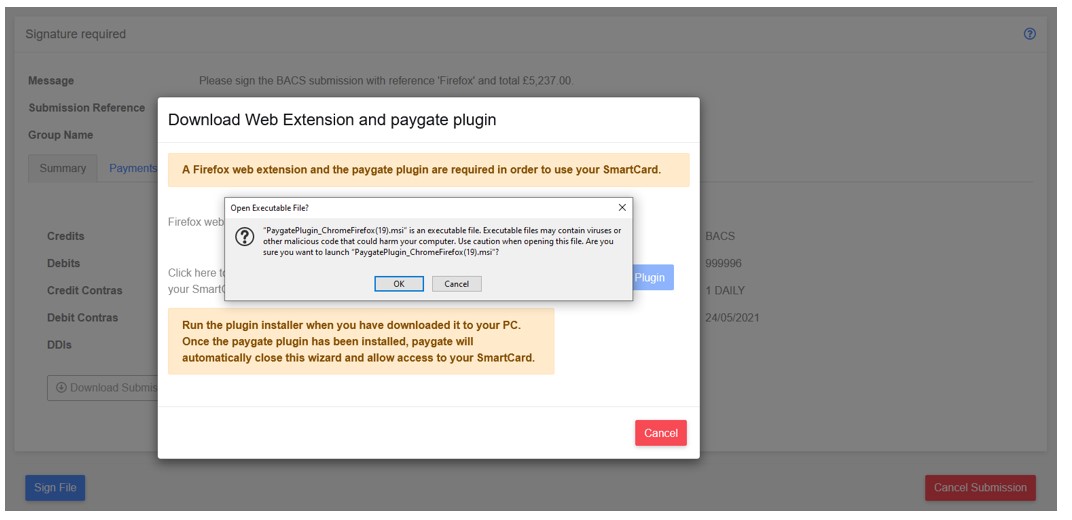
Click “OK”. A “Windows protected your PC” dialog will appear.
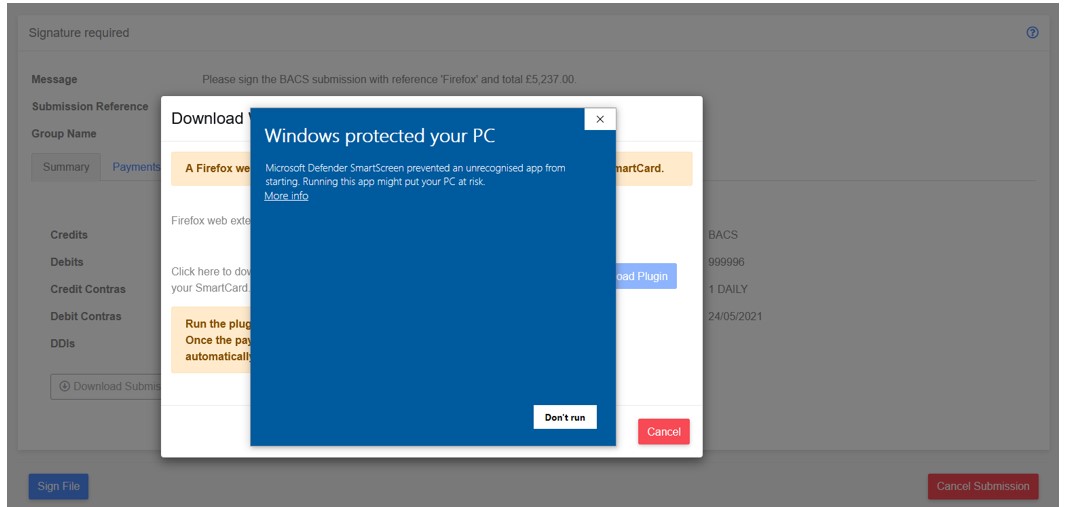
Click “More info”.
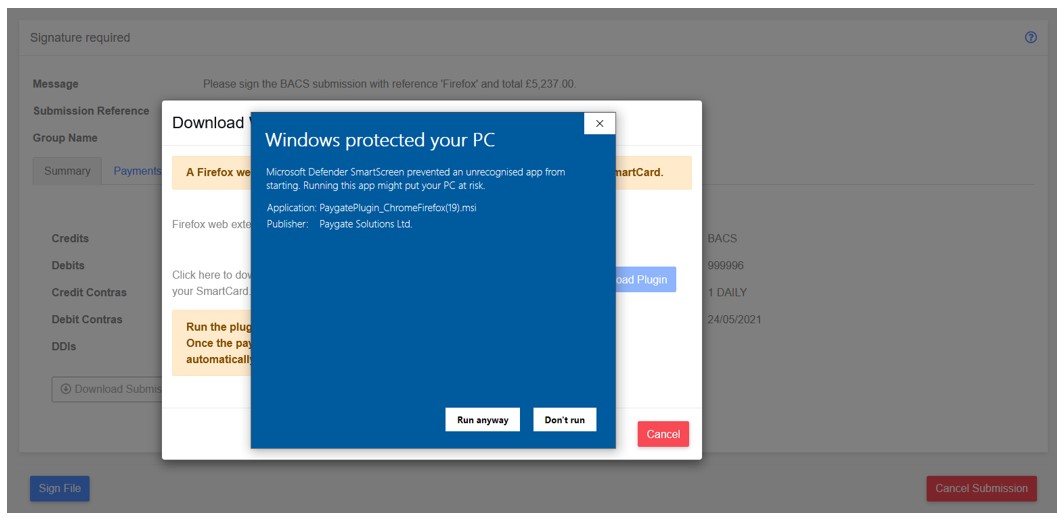
Click “Run anyway”. The Paygate plugin Wizard will be displayed.
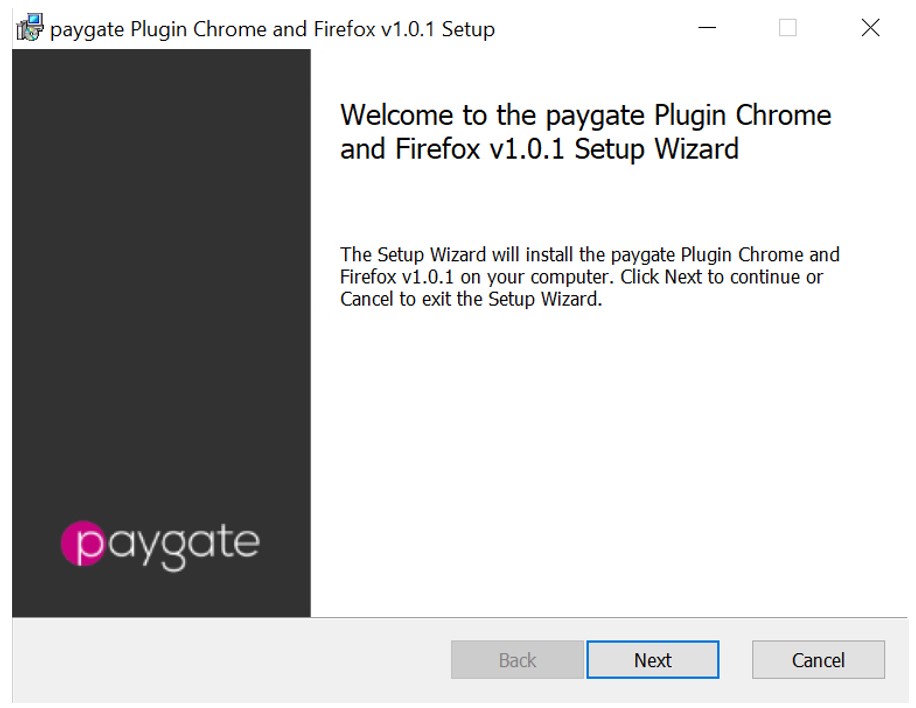
Click “Next”. The “End-User License Agreement” screen will be shown.
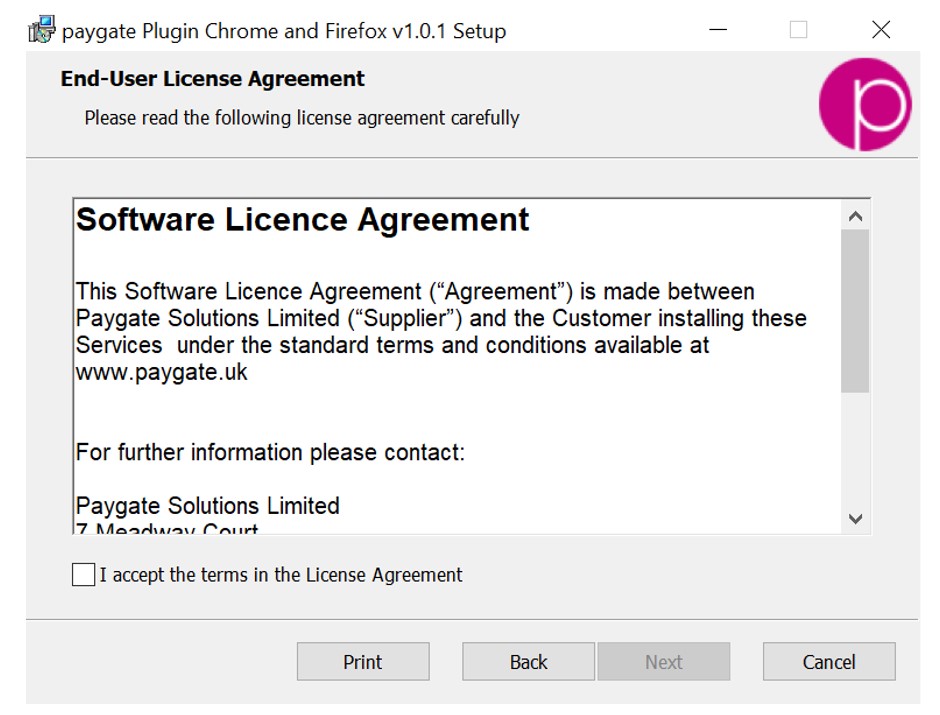
Read the agreement and then tick the “accept” tick box. The “Next” button will become enabled.

Click “Next”. The “Destination Folder” screen will be shown.
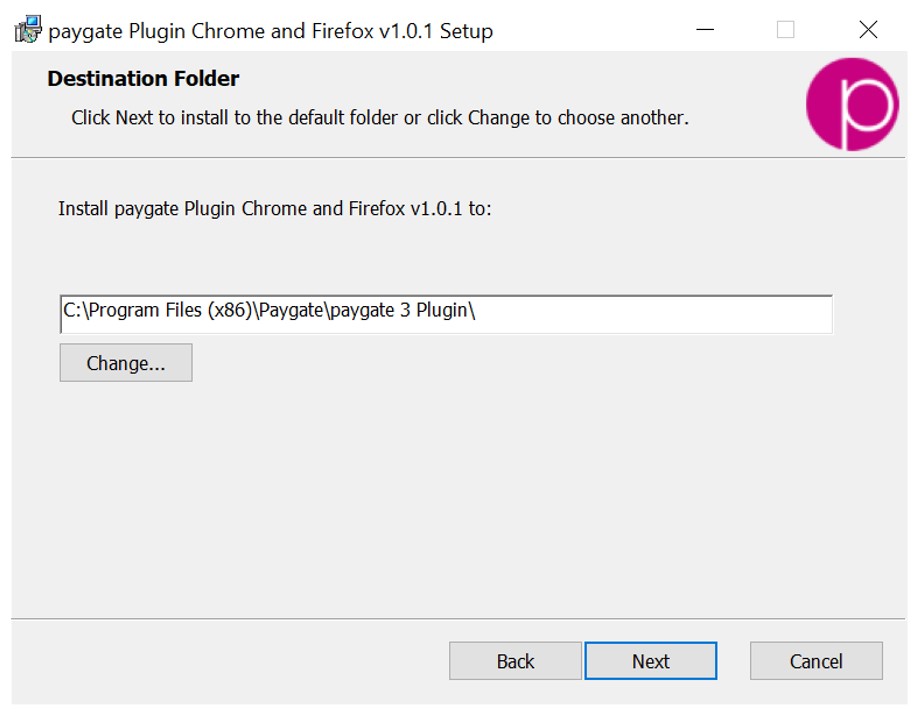
Click “Next” to use the default folder displayed on screen. The “Ready to install” screen will be shown.
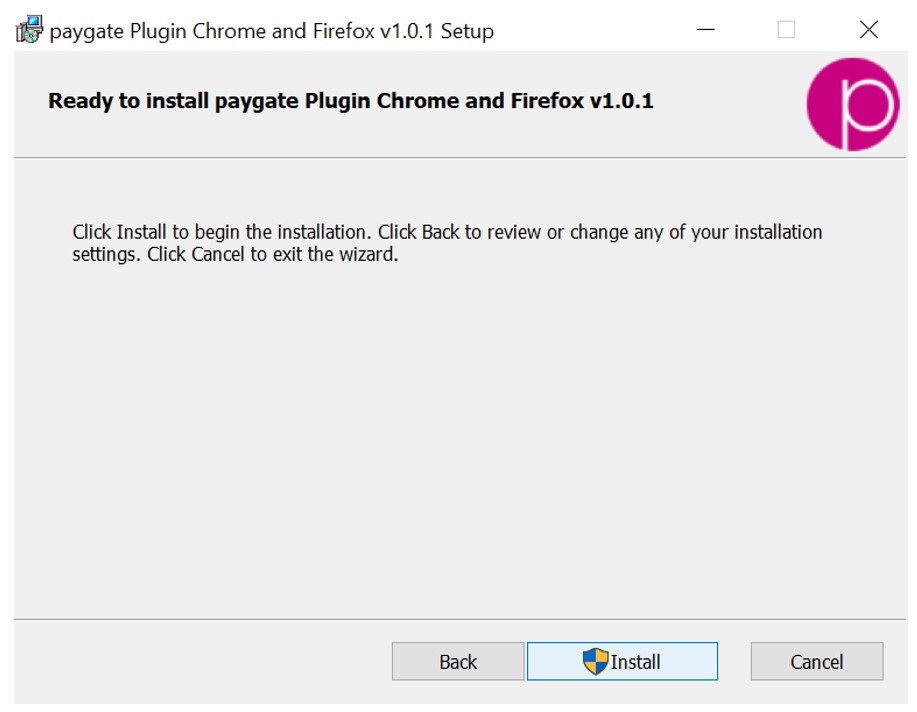
Click “Install”. A “User Account Control” dialog will be displayed.
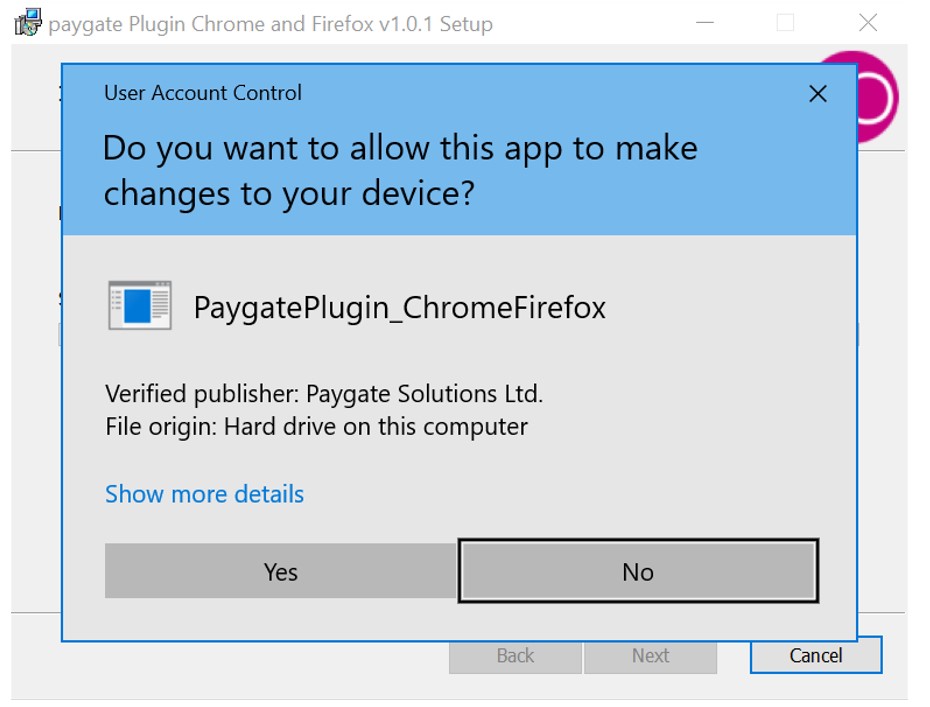
Click “Yes”. The “Installing” screen will be shown.
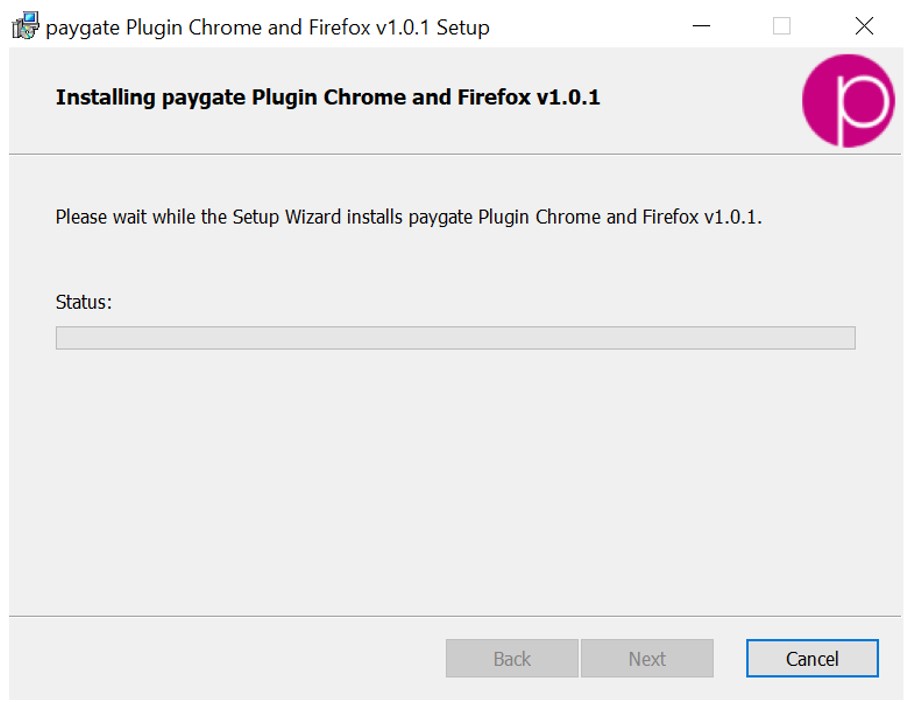
The Paygate plugin install will finish installing and the “Completed” screen will be shown.
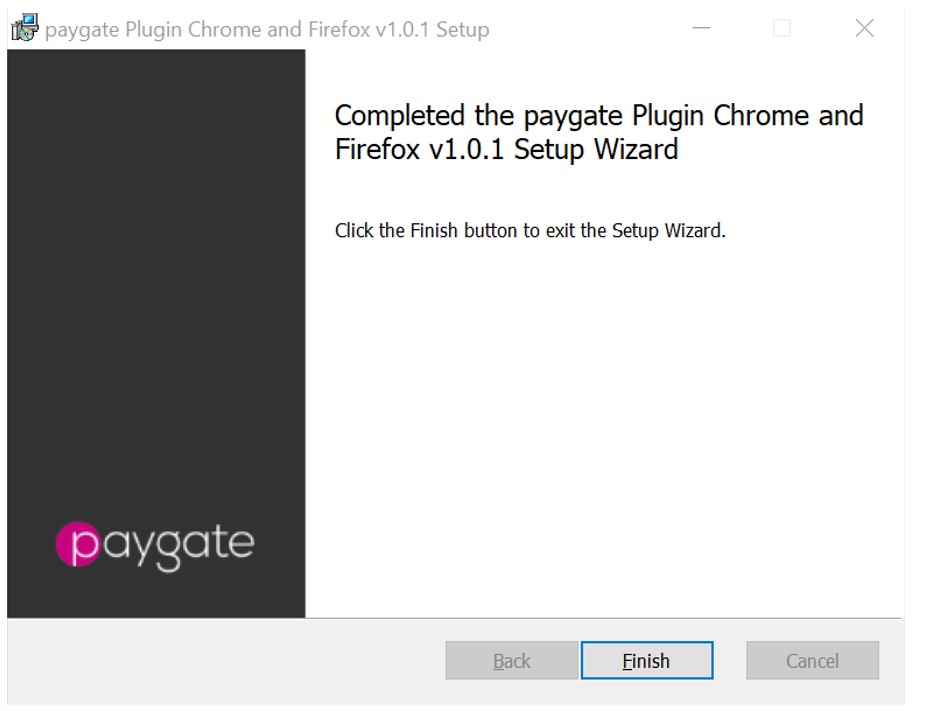
Click “Finish” to exit the Wizard. The “Download Web Extension and Paygate plugin” dialog will automatically be closed.
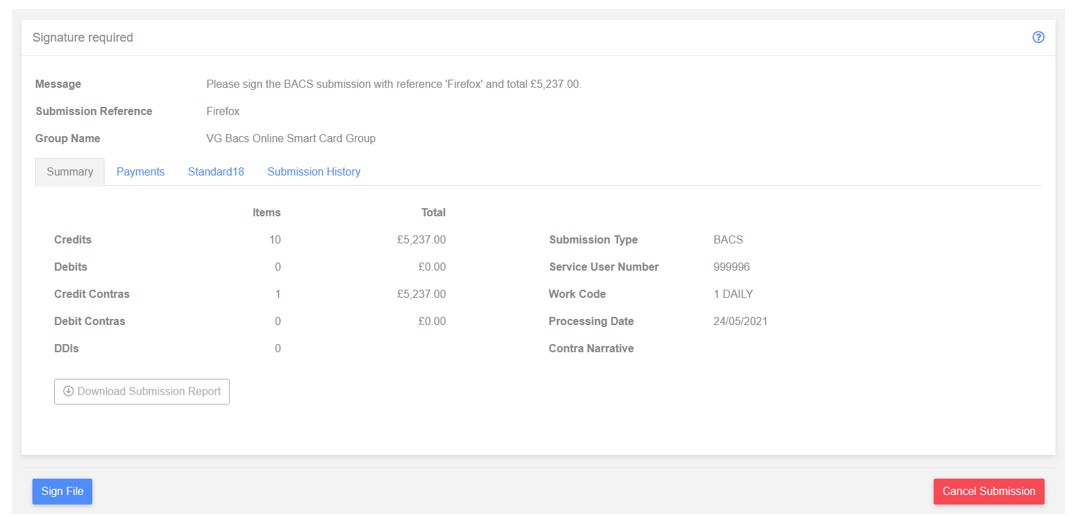
Click “Sign File”. The Sign dialog will be displayed.
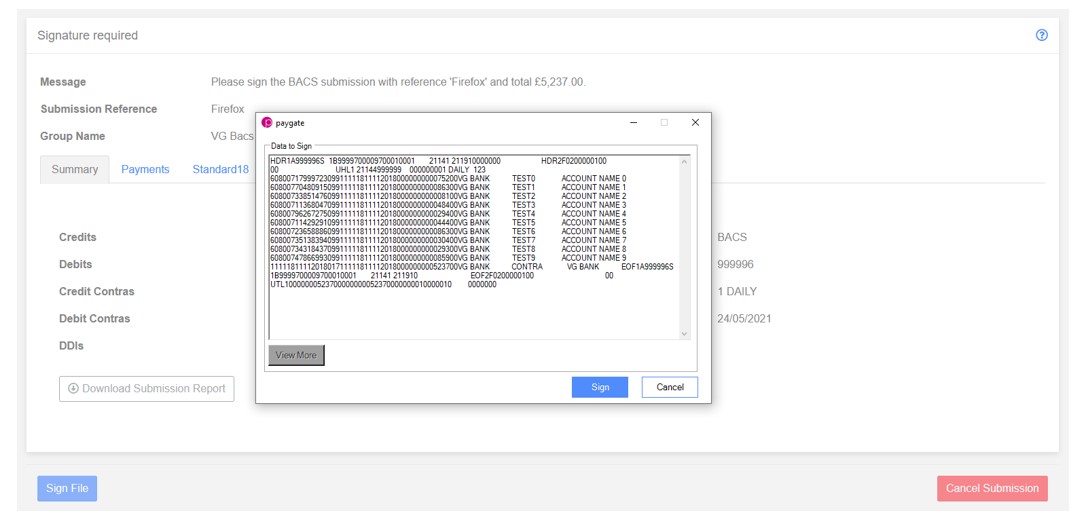
Click “Sign”. The Sign dialog will close and the Smart Card PIN dialog will be displayed.
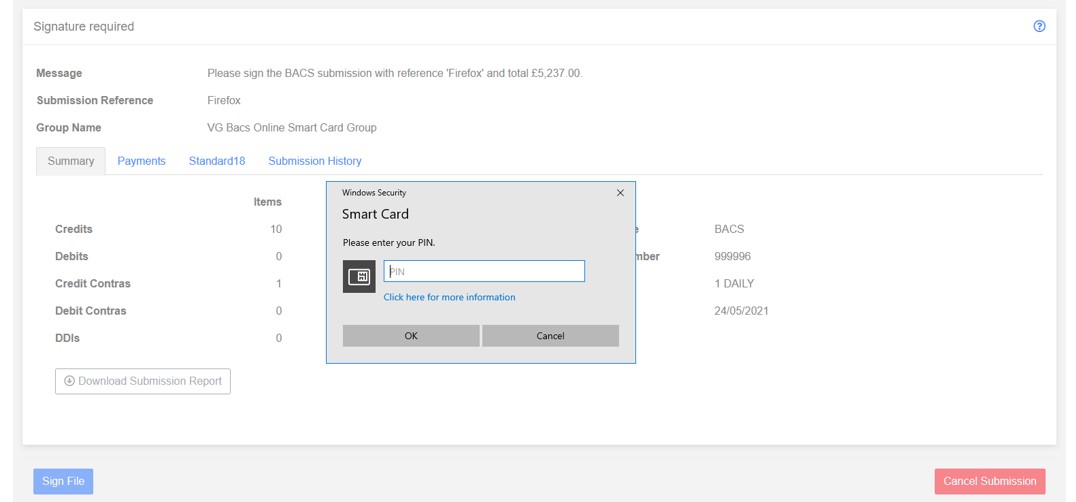
Enter PIN and click “OK” to Sign the Submission. The Submission will be Signed and will progress to the Approve stage. Continue the Submission as usual.