Payments API - Getting Started
Overview
In this tutorial, you will be guided through the process of setting up the Paygate environment for payment API use.
We will show you:
- How to create an API service account
- The group user settings required for payment API use
- The authorisation settings required within the API application
- A basic API call to get you started
The payment API can be used for BACS and Faster Payments and for both Direct and Indirect Groups.
As per the Paygate application, the payment API will allow you to create and process submissions and access the submission summary report on completion.
The payment API will also allow you to monitor the progress of a submission, search the submission and payment details and download reports (see the Payments API Documentation via the Developer Portal (API Documentation > Payments API) for a full list of available API calls).
This tutorial is for both existing and new users to Paygate.
Prerequisites
There are a few prerequisites for using the payment API:
Access to Paygate
An application or test tool (e.g. Insomnia or Postman) to send API calls to the website
A Paygate user account with the following user roles:
- Customer Administrator
- Manage Users
- Add Groups (if you are creating a new group)
- or Group Administrator group user role for the required group (if you are modifying an existing group)
Step 1 - Licence
To use the payment API, you will need:
- An API service account
- Payments API access
Service accounts and payments API are both licensed features.
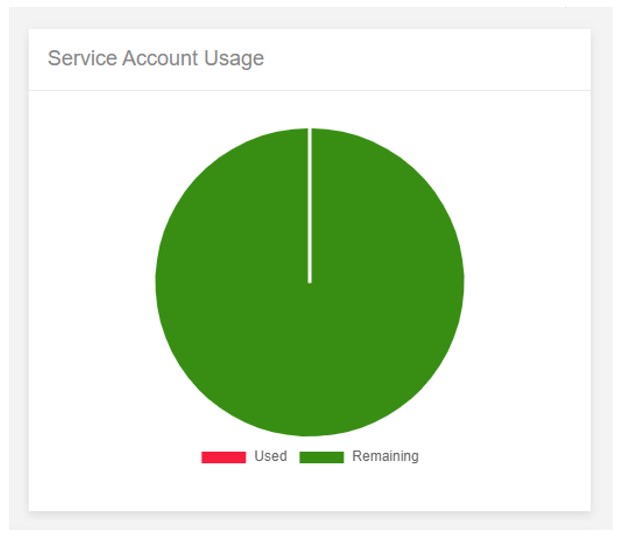
Ensure you have the BACS API and/or the FPS API enabled within your licence and that you have an available service account.
To check your licence, navigate to Admin > Customer > Licence within the Paygate application.
Available service accounts will be displayed within the service account Usage panel:
Access to the payment API will be displayed within the Payments panel:
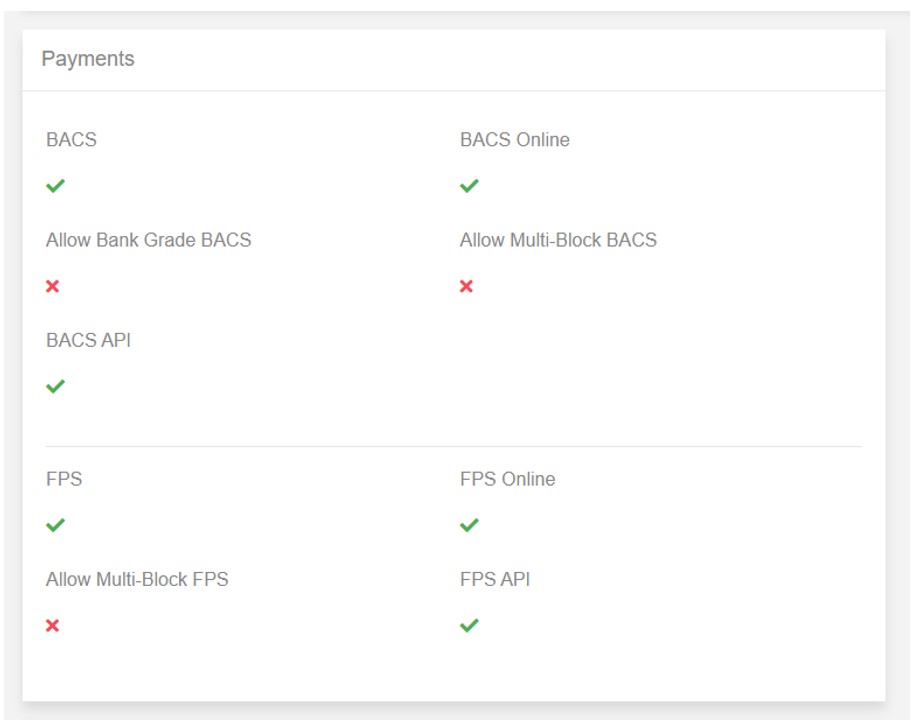
If these features are absent, please contact support to add these to your licence.
Step 2 - Service Account
The next step is to create an API service account.
The API service account provides an API Key which is required to establish a connection to Paygate.
Create the Service Account
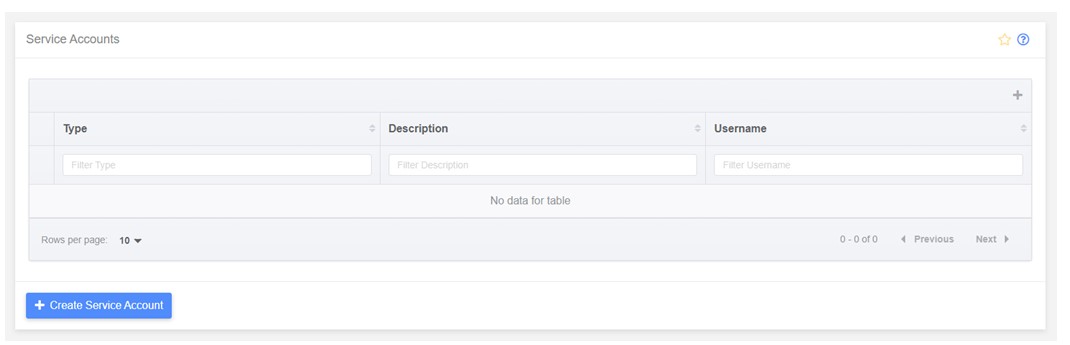
To create an API service account, navigate to Admin > Service Accounts.
A table will be displayed with any current service accounts. For new Paygate customers, this table will be empty.
At the bottom of the table, click “Create Service Account”.
The Create Service Account page will be displayed:

Type
To create an API service account, open the “Type” selector and set to “API”.
Username
On setting the Type to API, this will then display the “Username” field.
Enter a “Username” for the service account.
N.B. The username must be alphanumeric characters and cannot contain spaces.
Description
Adding a Description is not mandatory but can help to easily identify between accounts within the service accounts table.
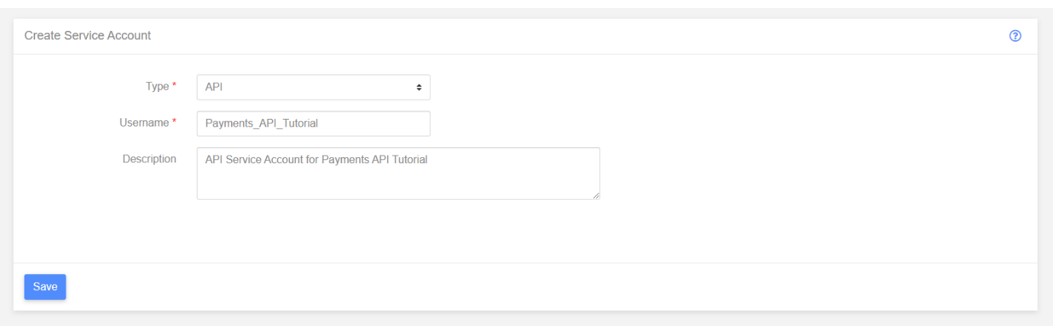
Click “Save” to create the service account.
N.B. You can create multiple API service accounts, providing you have available service account usage within your licence.
API Key
Following creation, the service account will be displayed within the service accounts table.
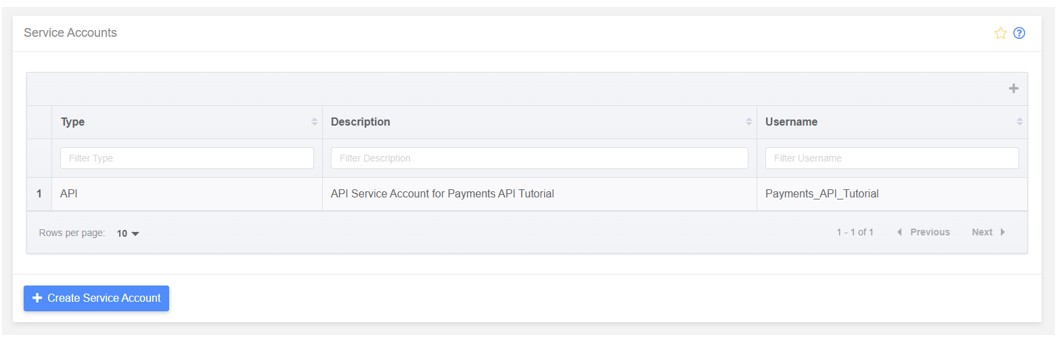
To access the API key, click on the service account row.
The Edit Service Account page will be displayed:
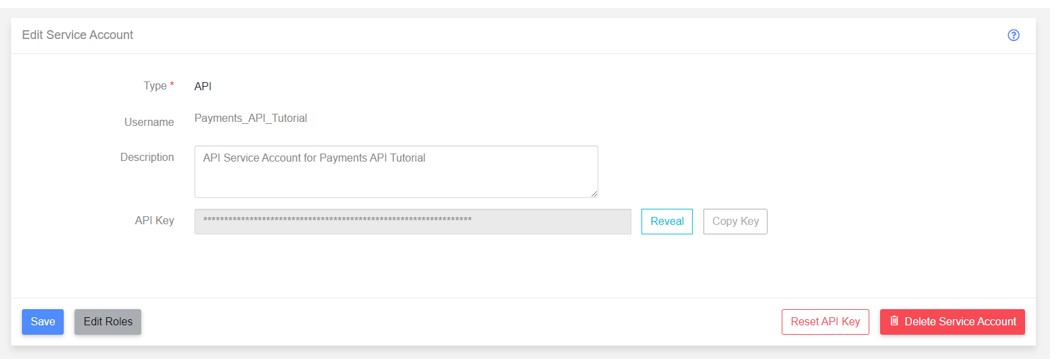
Here you will now have access to the API key.
Click “Reveal” if you would like to display the API key on screen.
To copy the API key, simply click “Copy Key” to use the key within your API application.
Within this page, you can also click “Edit Roles” to add roles and limits to the service account.

On this page, the service account can be enabled or disabled (the service account is enabled by default) and Individual Item, Submission and Approval Limits can be set for the service account as per a user account.
Here, you can also allocate user roles to the service account. For the purpose of the payments API, no additional user roles are required.
Step 3 - Group Settings
Once the API service account has been created, this can then be added to the required payment group/s.
For new Paygate customers, ensure you have a group readily available (this can be set up via Admin > Groups).
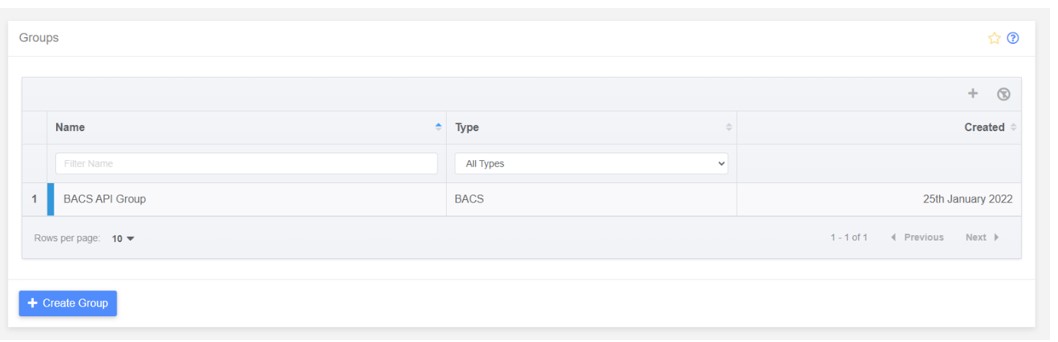
Navigate to the Groups table via Admin > Groups.
Click on the group row for the group you would like to access via the API application.
N.B. Ensure your group’s Payment Signing Method is set to HSM.
Group Users
For the API service account to be able to create and manage submissions for the selected group, the API service account needs to be added as a group user.
Navigate to the Group Users tab within the Edit Group page:
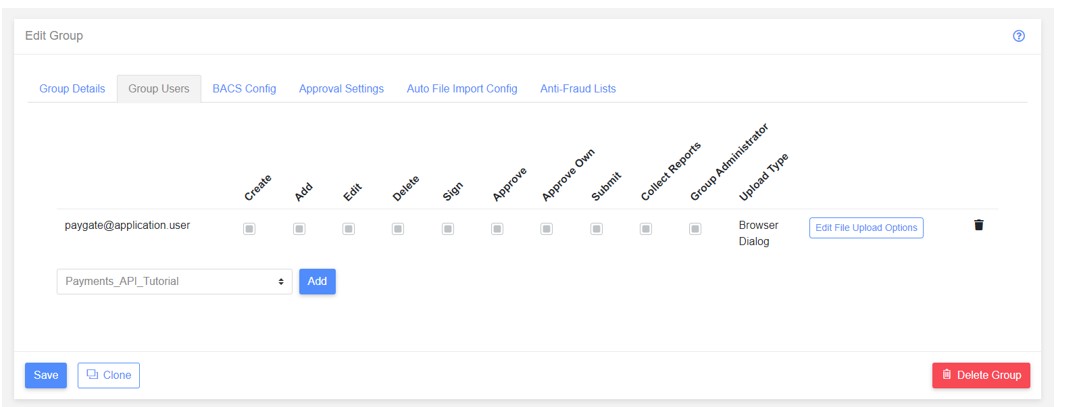
Select the API service account from the user selector and click “Add”.
Group User Roles
Once the API service account has been added to the group, group user roles need to be assigned to the API service account.
The group user roles will determine what the API service account is authorised to do within the API application for the selected group.
Create
The Create role is a fundamental role which not only allows the API service account to create and progress a submission but allows the API service account to view the submission and payment details, and to manage the status of the submission.
Add
This allows the API service account to add payments to a submission.
Edit
This allows the API service account to edit the details of a payment within in a submission. This role will be needed to correct any issues found during Pre-submission Validation
Delete
This allows the API service account to delete payments from a submission. This role will be needed to remove any payments that are no longer required within the submission.
Sign
This allows the API service account to sign submissions.
Approve
This allows the API service account to approve submissions.
Approve Own
For the API service account to approve submissions they have created, the Approve Own role is required.
Submit (Direct Groups Only)
The Submit role is only relevant to Direct groups and allows the API service account to send submissions to Vocalink.
Collect Reports
This allows the API service account to return the BACS and/or Faster Payments report lists and to download BACS and/or Faster Payments reports.
Group Administrator
For the payment API application, this role is not required.
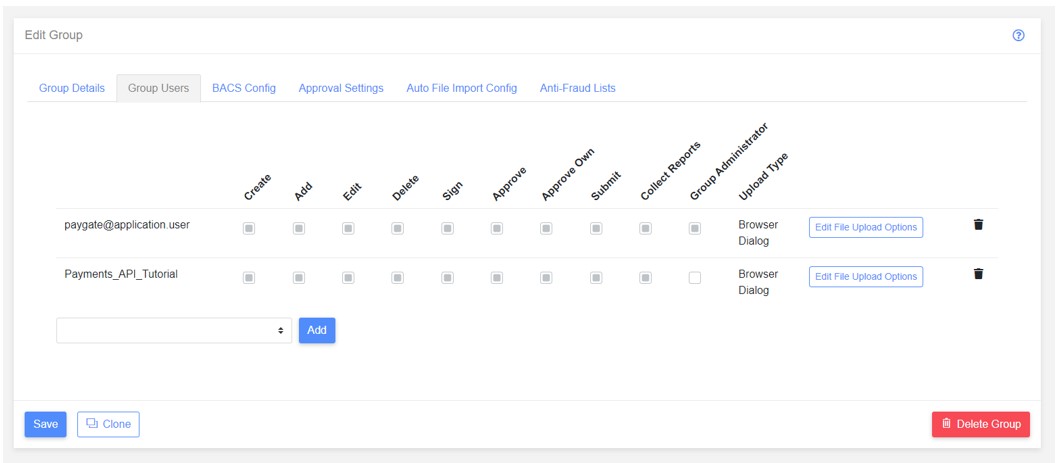
Tick each role that you require for the API service account and once all required roles have been assigned, click “Save”.
Step 4 – API Calls Within Your Application
Now that your API service account and group are ready for payment API use, the final stage is to set up your application.
Testing
Tools such as Insomnia or Postman can be used to test the API before developing an application.
Authorisation and Tokens
An OAuth2.0 access token needs to be created using the following configuration settings.
- Security Scheme Type: OAuth 2.0
- Grant Type: Client Credentials
- Access Token URL: https://api.paygateservice.com/identity/connect/token
- Client ID: paygate_api
- Client Secret: API service account API Key
This token must be included in each request to the API.
API Calls
Within your application, add the required API calls as per the Payments API Documentation via the Developer Portal (API Documentation > Payments API).
Each API call will perform checks against the licence, API service account and group user role permissions on being sent.
If the API service account does not have the required group user role or permissions to perform the call, the payment API will report this within the response and will not complete the requested call.
API Call Example
To get started with the payment API, we will show you a basic API call.
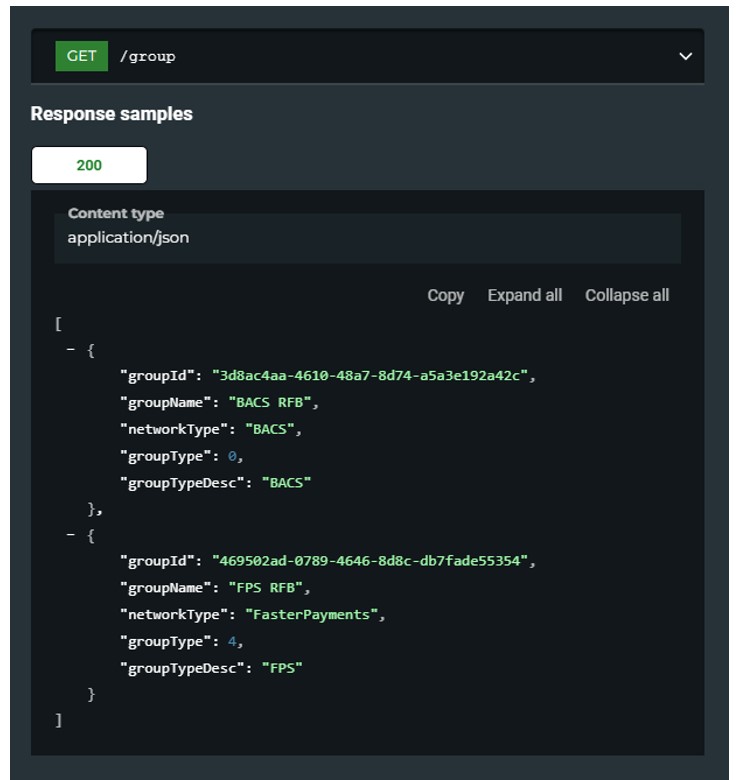
As the GET groups call acts as an initial step within the payment API submission process, we will look at this call as an example.
The GET groups call returns a list of groups that the API service account can create submissions for (only groups where the API service account has the “Create” role will be returned).
The GET group call does not have a request body and on a successful call being sent, the following details will be returned within the response:
- groupId: This is the ID of the group
- groupName: This is the name of the group
- networkType: This is the network type of the group: “BACS” or “FasterPayments”
- groupType: This is the numeric value of the group type: “0”, “3” “4” or “5”
- groupTypeDesc: This is the description of the group type: “BACS”, “BACSOnline”, “FPS” or “FPSOnline”
For more API call examples, see the Payments API Documentation via the Developer Portal (API Documentation > Payments API).