Builder
Builder
Builder allows a user to create a submission into which they can select the files they wish to submit. The files selected can be of any type supported by the system and can include mappings. Builder Submissions vary from Job Submissions in that they cannot be repeated unless they are converted into a Job during the process.
Building a Submission
Selecting Builder from the Bureau menu will present the user with the “Manual Bureau Submission Builder” screen, pictured below:

There are a number of options with required fields indicated by an asterisk (*):
- Select a Submission Group - The submission requires that a Bureau group is set, as the group settings contain necessary information, such as Service User Number and Signing Method.
- Submission Reference - The reference is how the user will identify the submission they are working on within the system and in subsequent reports.
- Contra Narrative - The Contra narrative for a submission may be set at submission level.
- Payment Date - The date at which payments will be collected. Updating the payment date will recalculate the processing date.
Once the required fields have been set, the Create Submission button will be enabled, progressing the user to the next screen where the user selects the files which are to be used.
Selecting files for Submission

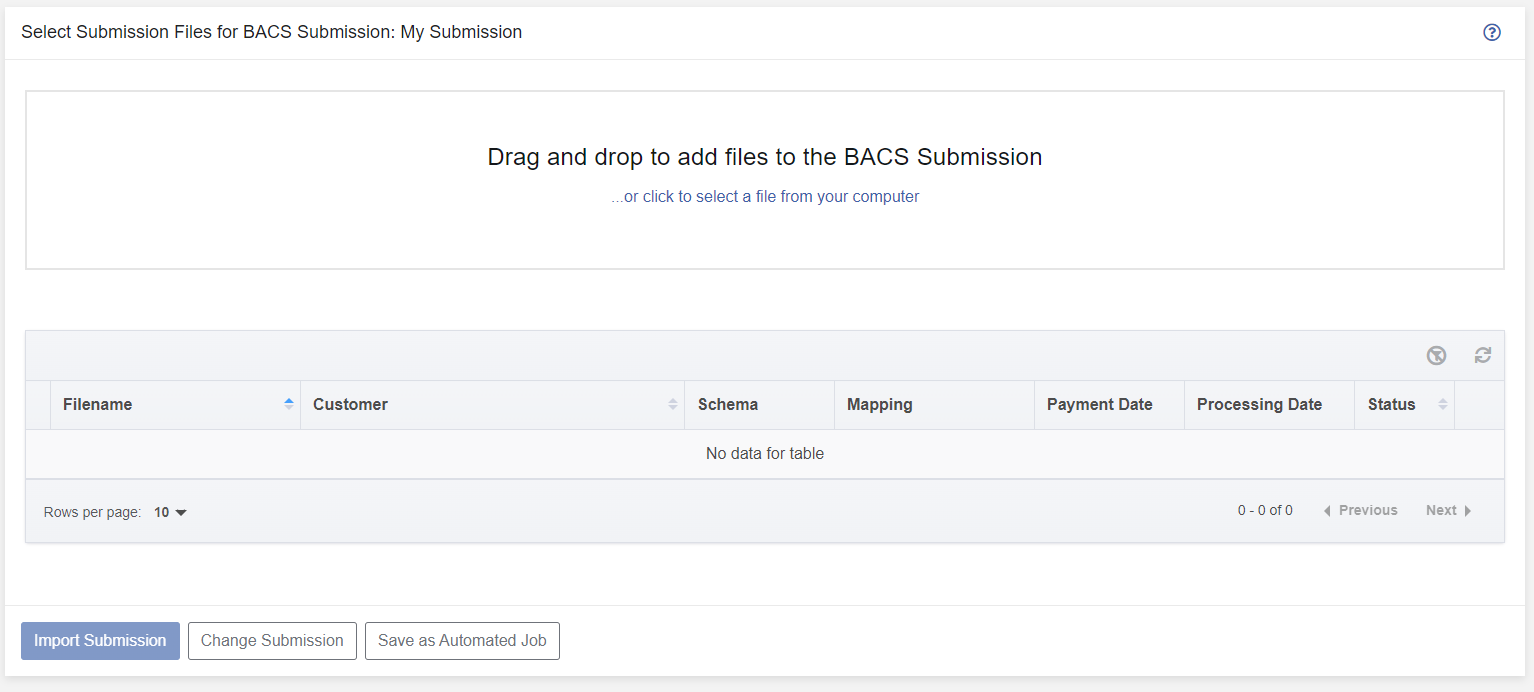
Pictured above is the “Select Submission Files for Submission” screen, where the user specifies which files will be submitted. The submission reference “My Submission” is appended to the page title above.
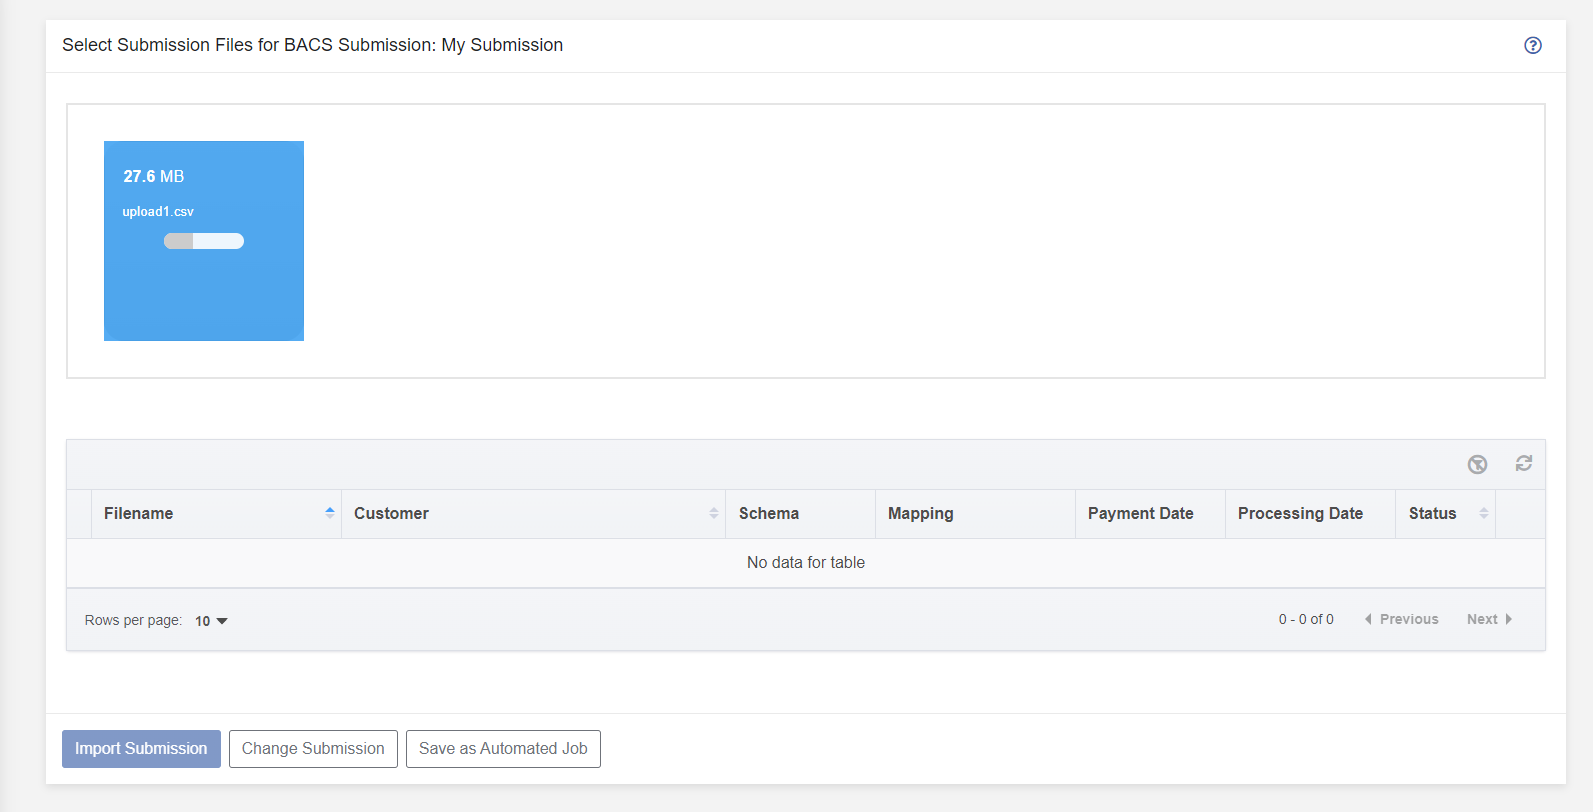
To start building a submission (using the default file upload settings defined at Group level), a file, or multiple files are dragged into the area labelled “Drag and drop to add files to the Submission”, and an icon will appear displaying the upload progress (pictured below):

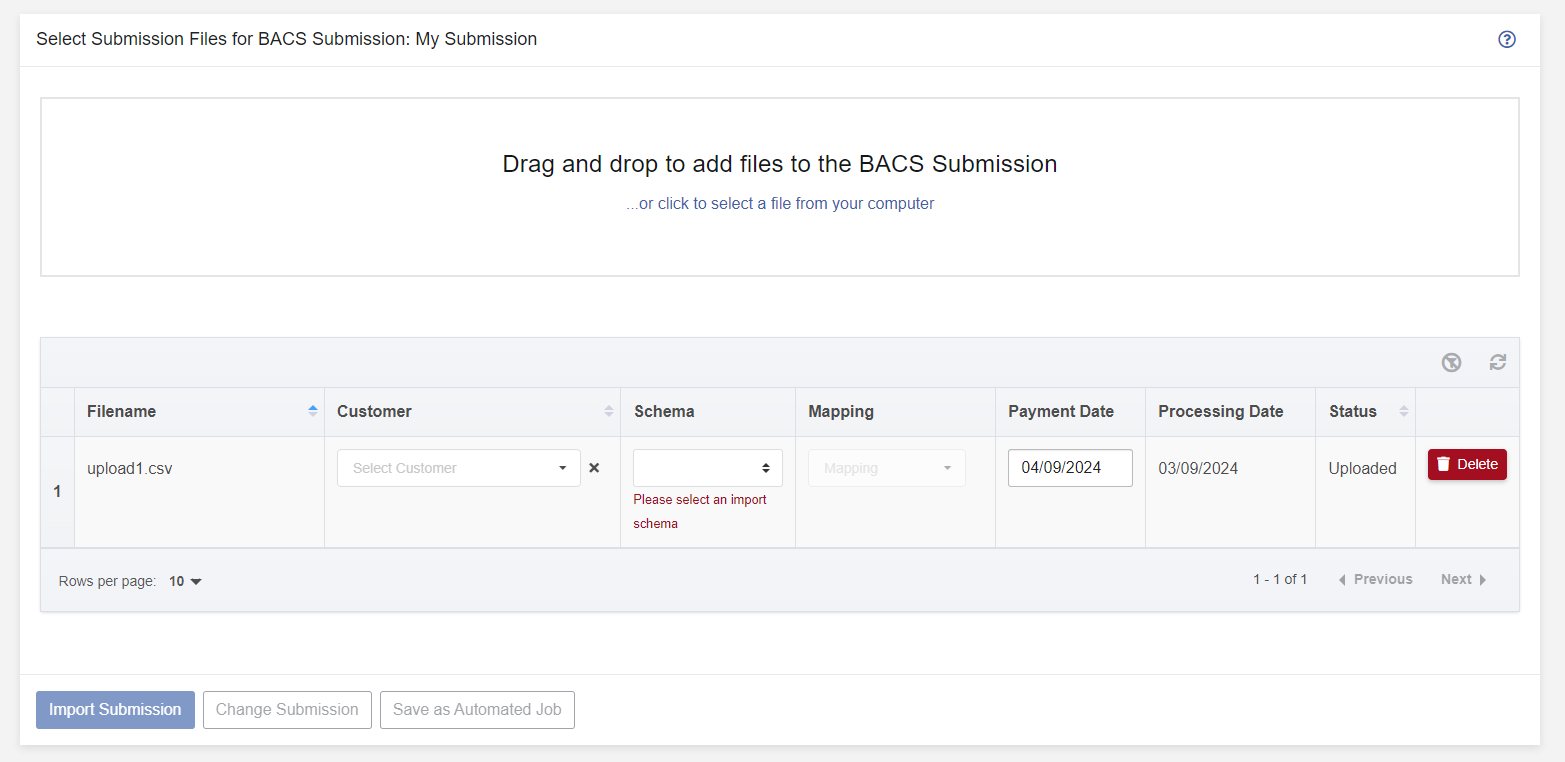
Once the upload has completed, the table below will be updated to include the file that was uploaded (pictured below):

Following the upload, a file needs to be imported into Paygate so that it may be included in a submission. Each upload file can be imported once the following parameters have been set:
- Customer - the defined Bureau Customer that is for the file, this will set the Service User Number (SUN) and the associated banking details that are used in the submission.
- Schema - the file can be imported using the following schemas:
- Standard 18
- Legacy
- Mapping
- Mapping - If Mapping is selected as the import schema, then the Mapping field is enabled, allowing the selection of which Mapping to use on import.
- Payment Date
Files can also be removed from an upload by clicking on the Delete button for each row.
Following the population of all the required fields, the “Import Submission” button will become enabled (pictured below), clicking the button will progress to the page where files are imported:

Importing Submission Files

The import follows a four stage process:
- Gathering
- Importing - in which the file contents are parsed and stored.
- Processing - in which bureau-related data is associated with the payments.
- Validation - records are validated against scheme rules, the results are displayed and corrections can be made later in the process.
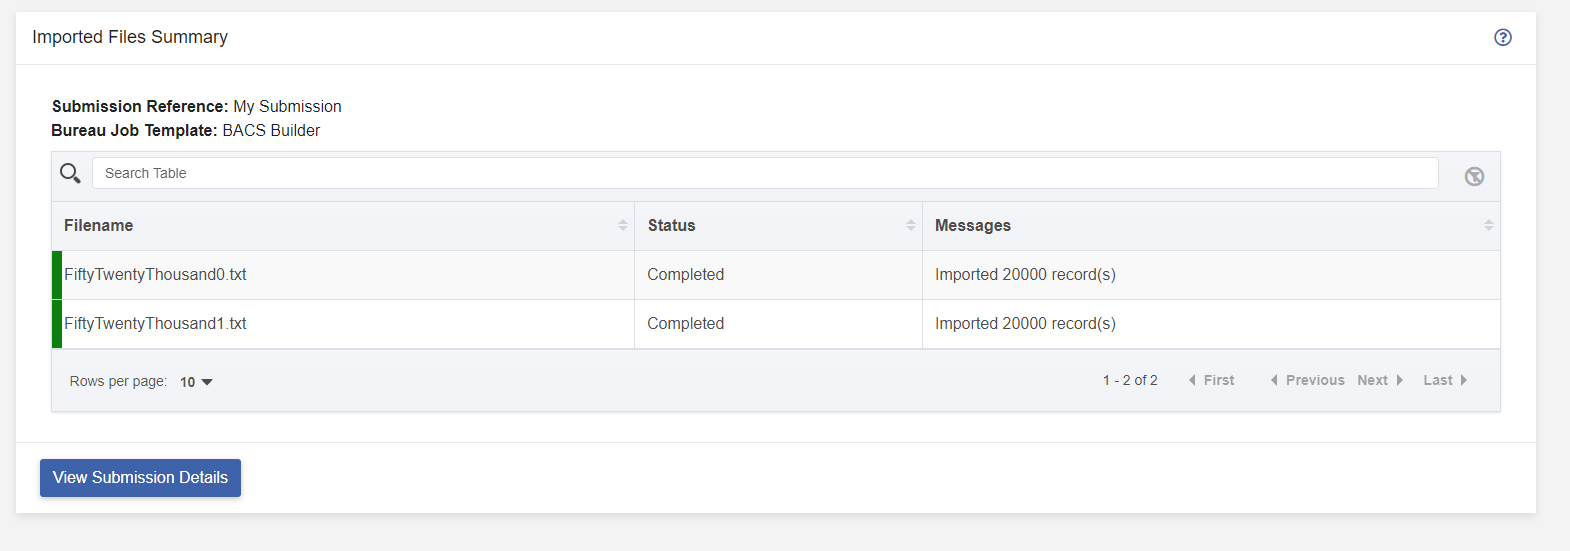
Once Validation has completed, the application will navigate to the Imported Files Summary page.
Imported Files Summary

The results of importing are displayed on the page pictured above, with the record count for each successfully imported file. The user will also be informed if the file has been used within the past 31 days, or if there has been a failure importing.
Clicking on the “View Submission Details” button will progress the submission to the next stage, detailed in the Submissions documentation.
