Jobs
Jobs
Jobs are a template for Bureau submissions, they allow you to configure commonly/routinely ran Bureau submissions so that you don’t have to build them from scratch each time.
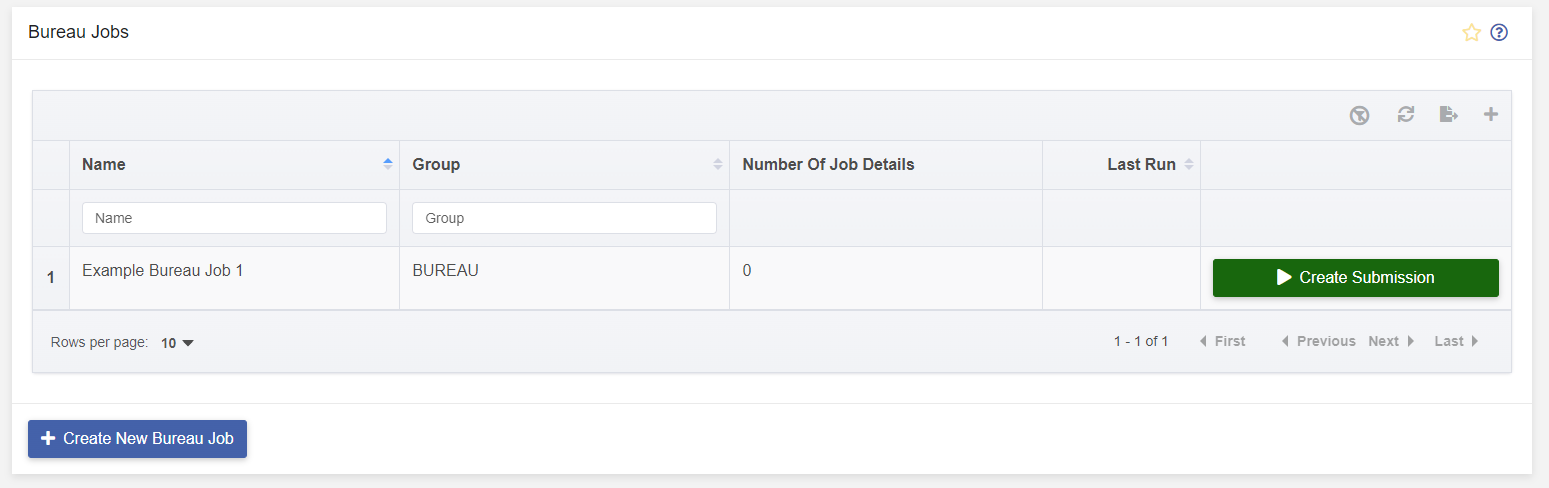
From the jobs screen you can create and edit bureau jobs.
Creating a Job
To create a job you can press the “Create New Bureau Job” button at the bottom of the table or press the plus icon at the top right of the table.
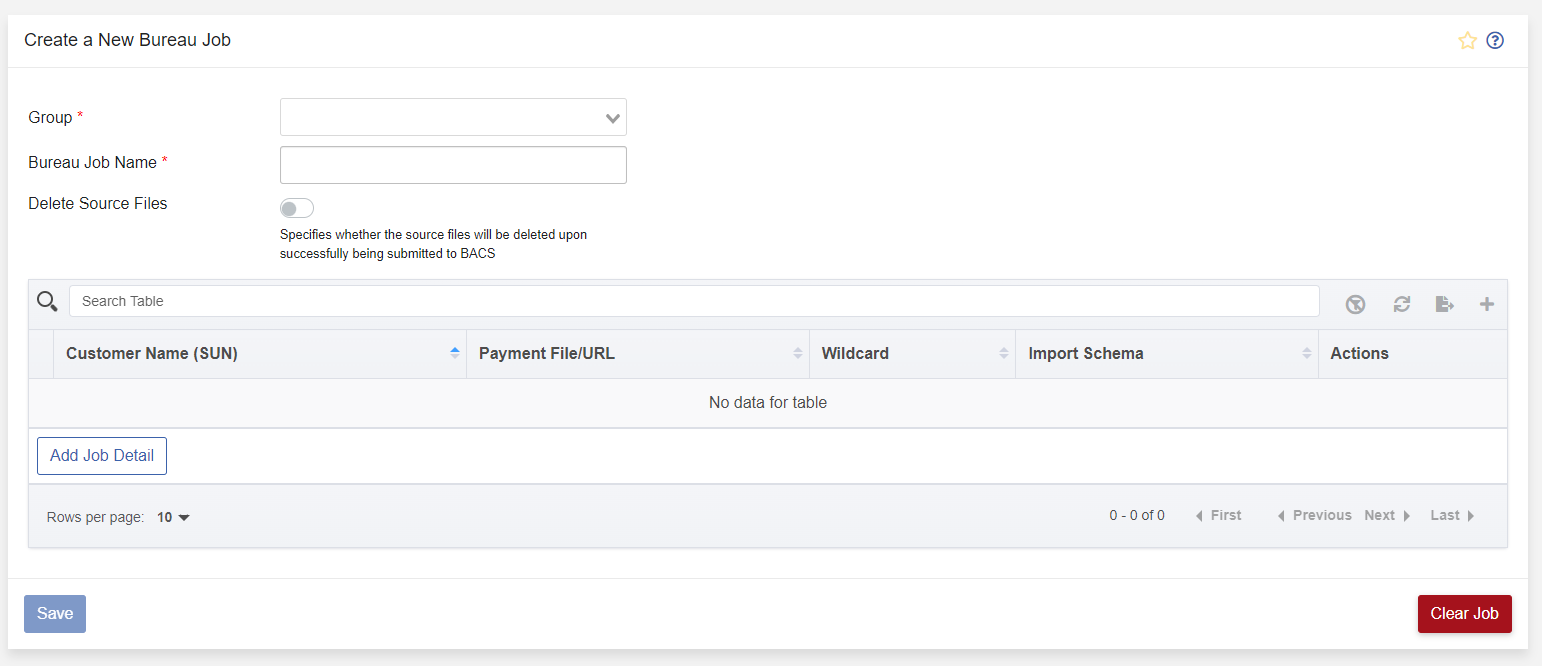
Once here you can fill out all the details for this job, a Bureau Group and a name are mandatory, however job details are not.
Managing a Job
To edit a job you can press on the row that the job is in, this will take you to the edit job screen, here you can change the group assigned to the job and manage the job details.
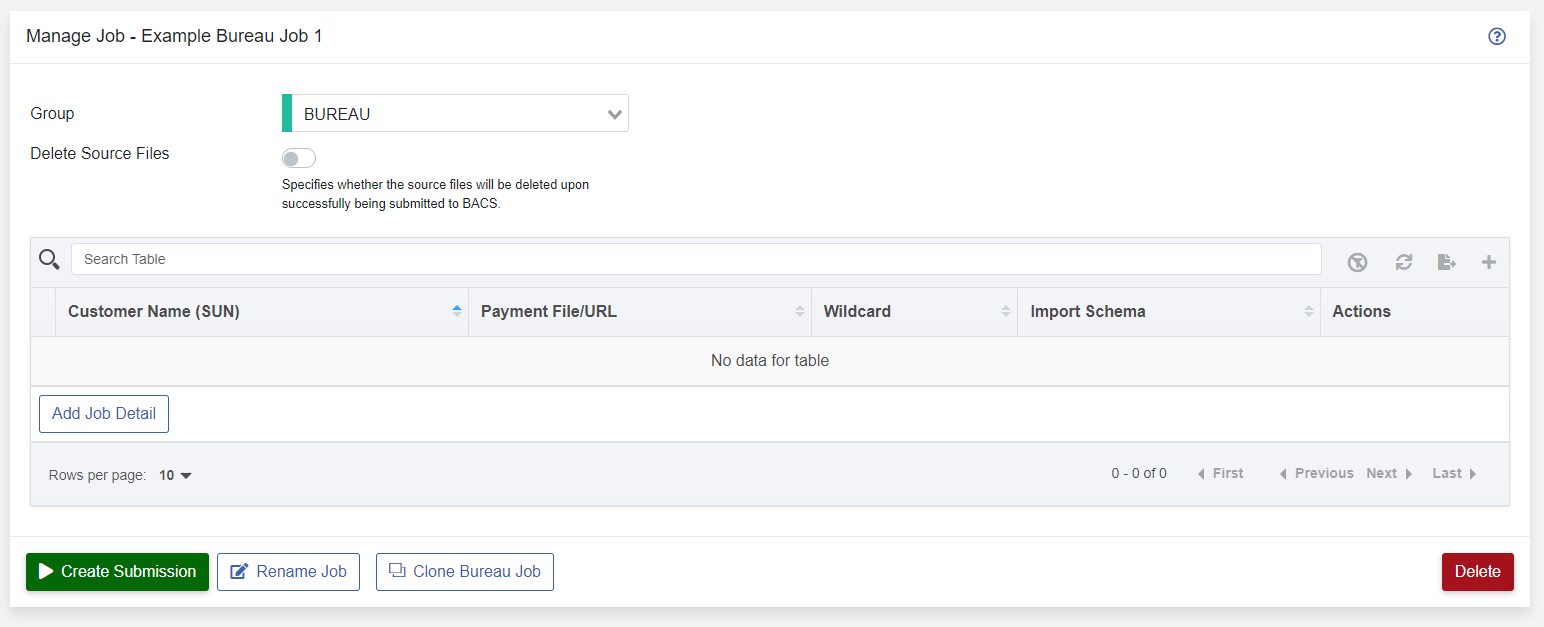
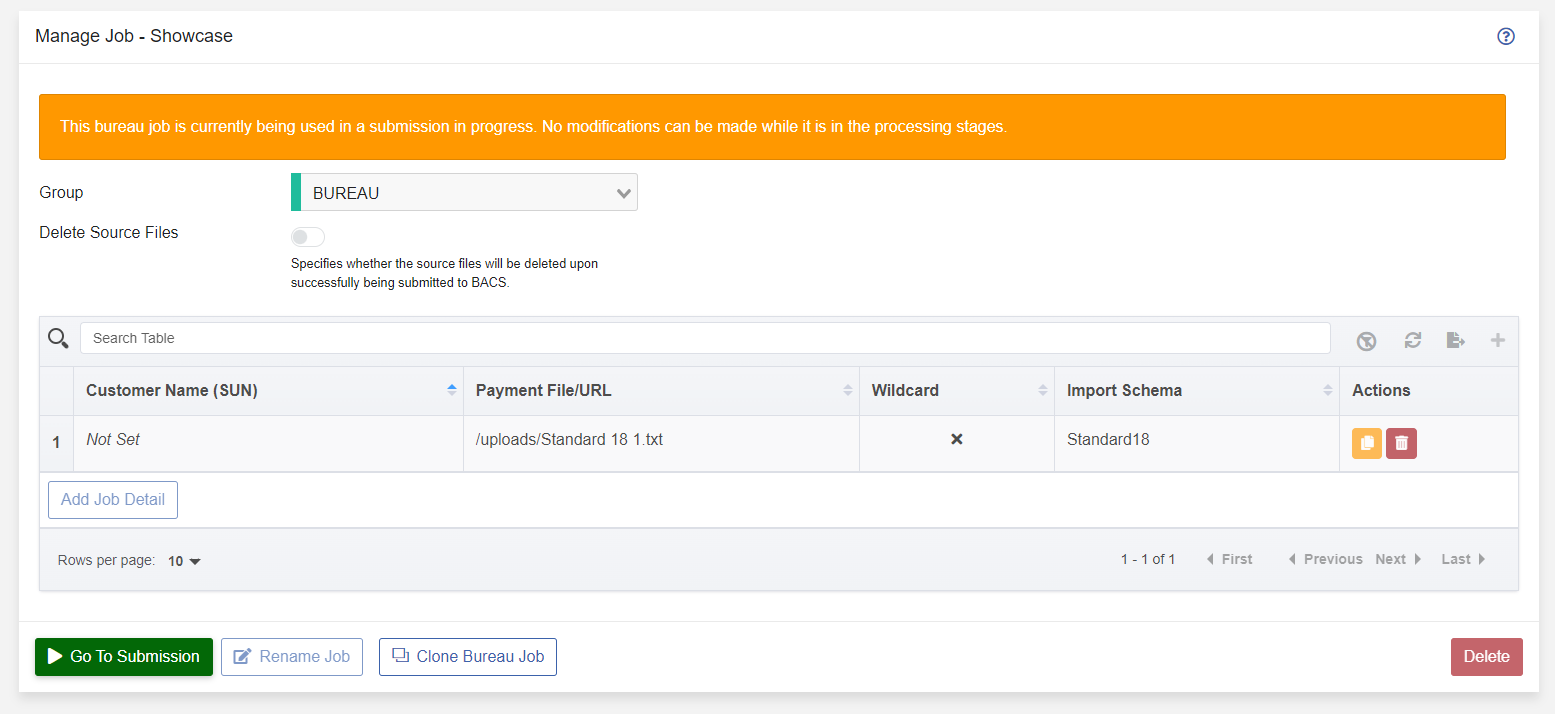
You can only manage jobs that don’t have a submission currently open.
You can clone jobs or rename them using the buttons on the footer, both will require you to enter a new name.
Deleting a Job
To delete a job go to the Manage Job screen and press the delete button, you will be prompted before deletion if you’re sure you want to delete that job.
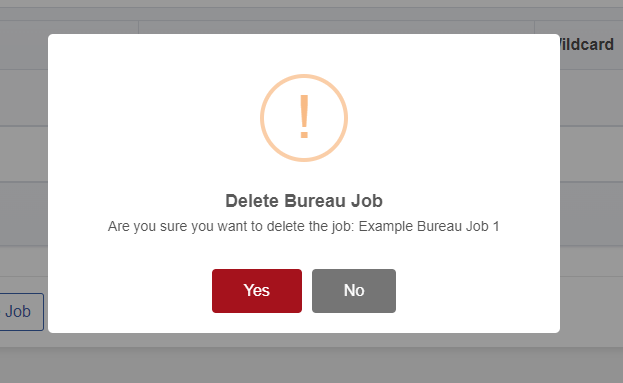
You can only delete jobs that don’t have a submission currently open.
Job Details
Job Details make up the “bulk” of a Job as they are the instructions on how to handle the files for the submission.
Managing Job Details
You can manage job details while creating a job or managing a job
I’ll be using the Manage Job screen for this but it will be the same for creating a Bureau Job.
You can add a new job detail by pressing the “Add Job Detail” button or pressing the plus icon on the table, this will open a popup with the fields for a job detail.

From here you can enter the details for this job detail.
Some schemas don’t require a Bureau Customer set and you may also use wildcards and variable in your payment file(s) selection. Once saved, that job detail will appear on the job screen.
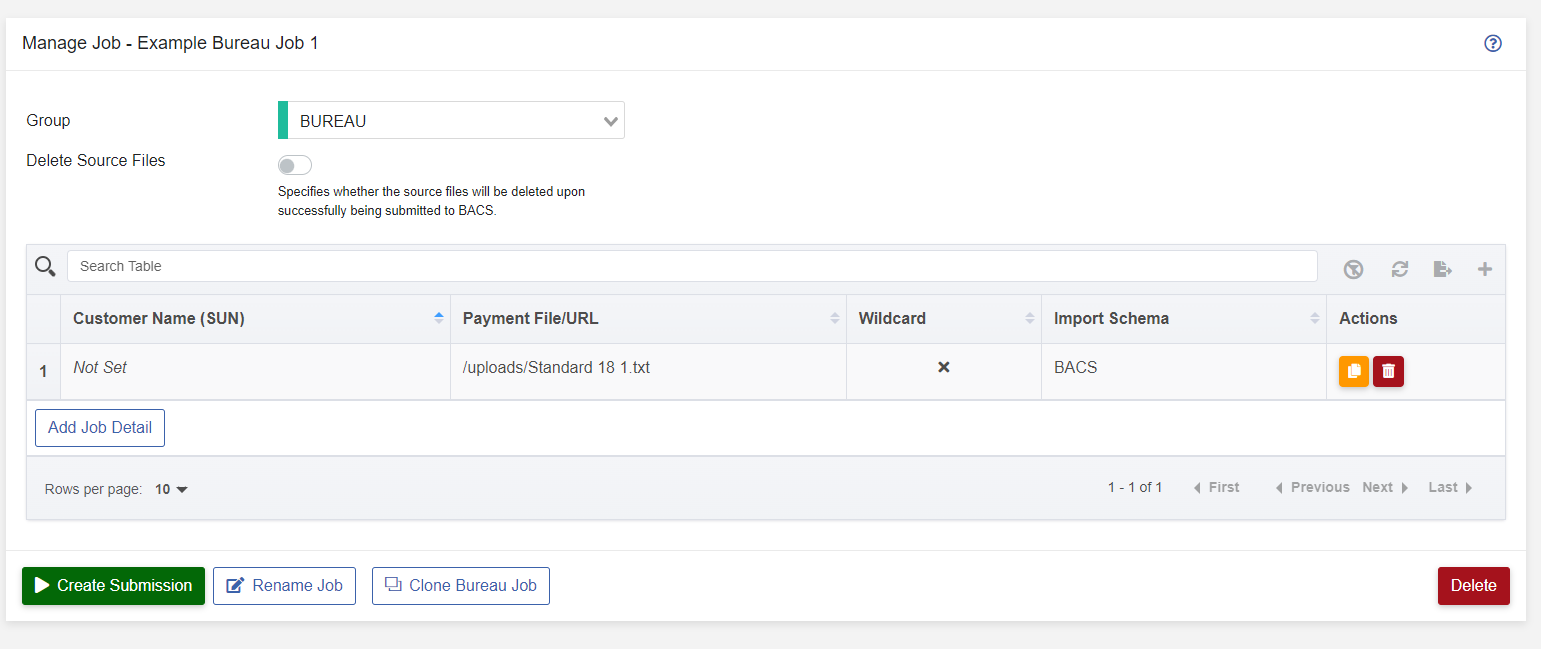
From here you can click on the row to edit that job detail, clone that detail or delete that detail.
Creating a Submission from a Job
From the Bureau Jobs page, clicking on the “Create Submission” button will progress the user to the “Submission Details” screen (pictured below):
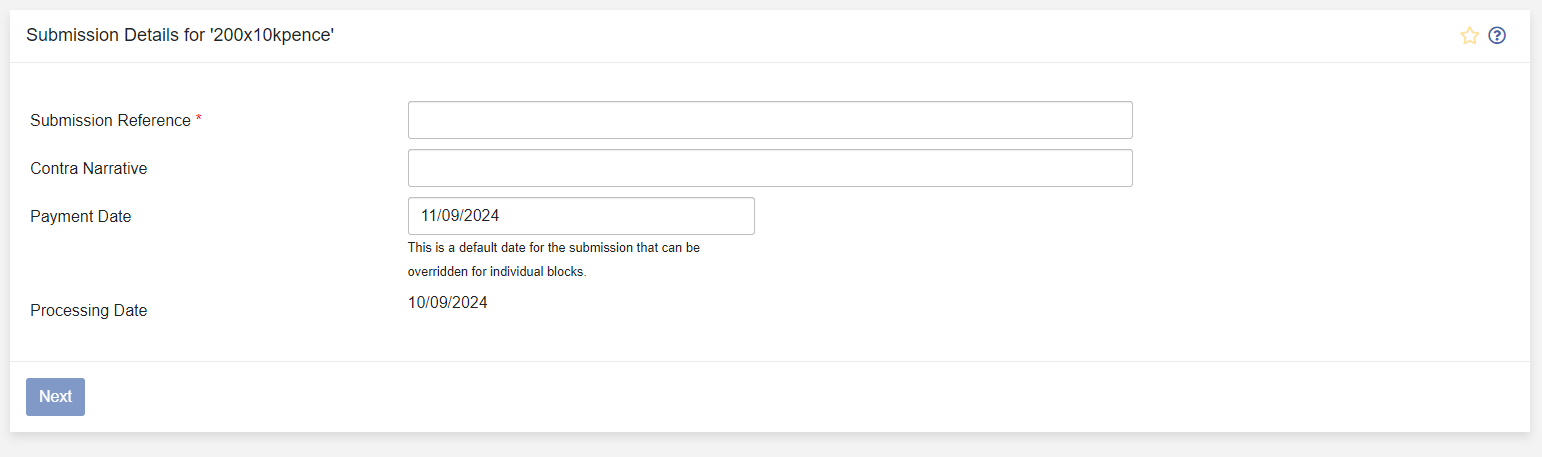
There are a number of options, with required fields indicated by an asterisk (*):
- Submission Reference - The reference is how the user will identify the submission they are working on within the system and in subsequent reports.
- Contra Narrative - The Contra narrative for a submission may be set at submission level.
- Payment Date - The date at which payments will be collected. Updating the payment date will recalculate the processing date.
Once the required fields have been set, the Next button will be enabled, progressing the user to the next screen where the files are imported.
Importing Submission Files

The import follows a four stage process:
- Gathering
- Importing - in which the file contents are parsed and stored.
- Processing - in which bureau-related data is associated with the payments.
- Validation - records are validated against scheme rules, the results are displayed and corrections can be made later in the process.
Once Validation has completed, the application will navigate to the Imported Files Summary page.
Imported Files Summary

The results of importing are displayed on the page pictured above, with the record count for each successfully imported file. The user will also be imported if the file has been used within the past 31 days, or if there has been a failure importing.
Clicking on the “View Submission Details” button will progress the submission to the next stage, detailed in the Submissions documentation.