Webhook Message Node
Purpose
A webhook is a way to send a custom http message to another web service. Webhooks can be used as a mechanism to send messages to third party services without writing any code.
For example, you could use a webhook in a workflow that sends a custom message to a team productivity application to raise an alert or log a message.
The functionality available within Paygate workflows is to send a custom webhook message. Paygate does not yet receive webhook message from third party services.
Usage
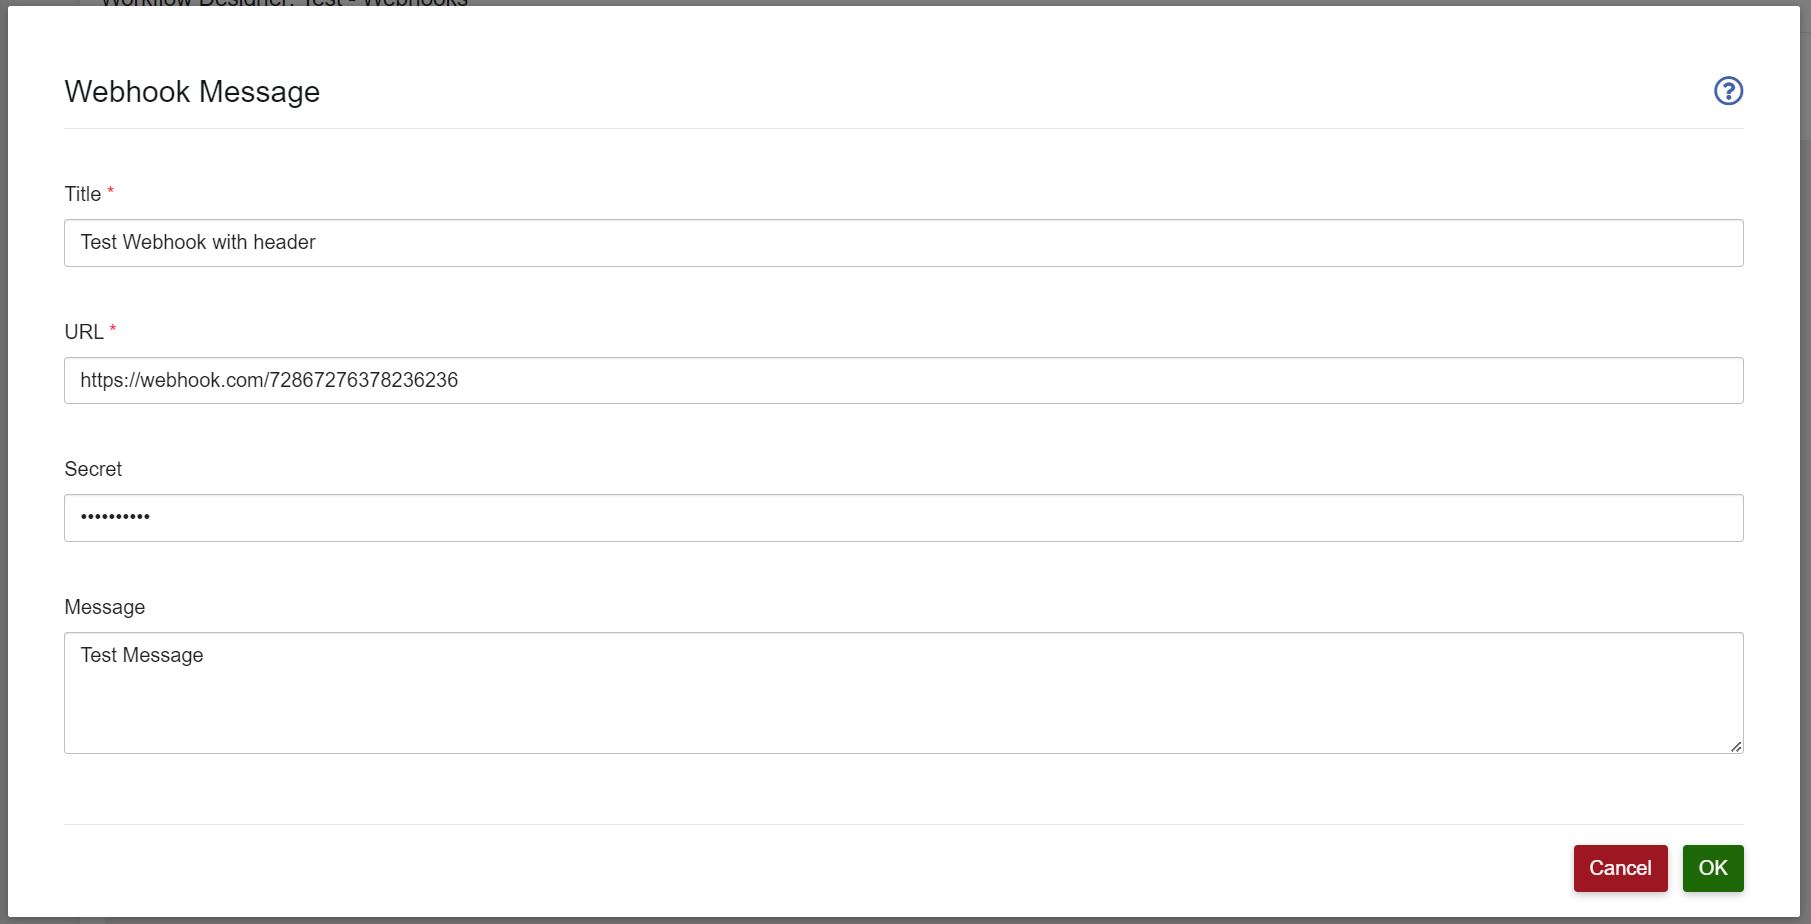
The webhook node takes title, message and url fields. The URL is the address of the webhook service that you want to send the webhook message to.
The contents of the message field will be wrapped in a json object as the value of a ‘data’ property, e.g.
{
    "data": "Hello this is Paygate"
}
Webhook Security
An optional secret can be used to help secure your webhooks against counterfeit and replay attacks. When a secret is included the contents of the webhook message are hashed and the resultant hash added to a special header in the webhook message.
To verify the webhook you can extract the hash from the message header, recompute the hash and compare the two. If the hashes are not the same then the message might be a counterfeit.
Hash algorithm: HMAC SHA-256
Header name: x-hmac-hash
Example: x-hmac-hash: AB5C47641317B5E4ABE38916828E46DFBD06A248AB8B8C2A253640119005082B
If a secret is not used, the header will not be created.
Using tokens in the payload
Tokens can be used in the payload by encapsulating the token in double curly brackets
| Token | Description |
|---|---|
| {date} | The current date in mm/mm/yyyy format |
| {time} | The current time in hh:mm:ss format where hh is 24hour clock format |
| {paygateid} | A UUID. Your Paygate Customer ID |
| {executionid} | A UUID. Identifies the instance of the workflow. In the BACS workflow will be the submission ID |
| {filename} | The current value of the filename variable |
Webhook Tutorial
In this tutorial we’re going to wire up a very simple webhook demonstration using a Paygate workflow and a third party webhook test site called webhook.site.
Note Paygate Solutions Ltd are not affiliated with webhook.site in any way.
1: Prepare your workflow
Log into Paygate and create a new blank workflow: From the Left-hand menu click Automation > Workflow > Workflow designer.
Drop in a webhook node: From the Nodes menu click messaging and then select ‘Webhook’ and click Select.
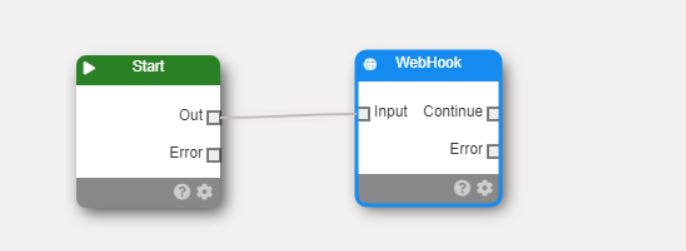
Draw a connector between the ‘out’ of the Start Node and the ‘Input’ of the Webhook node.
this is a very simple workflow. When executed the workflow will immediately run the webhook node.
2: Create a webhook test site
We’re going to use the free, online site https://webhook.site/ to create a simple webhook listener. Open the site by browsing to https://webhook.site/.
Notice the URL under the heading ‘Your Unique URL’. Copy this entire URL. This is the address that we’ll send our webhook to.
For example: https://webhook.site/26d9b660-45de-4b3f-8efd-5bbda1277aaq
3: Complete the workflow
Back to your workflow. Click the cog button on the webhook node to edit the webhook node message configuration.
Type in a title and then copy the URL from step 2 into the URL text box. Complete the configuration by adding a simple message in plain text.
Click ok and save your workflow.
4: Test the webhook
Run the workflow from the designer. This will execute the workflow node and hopefully send a webhook message.
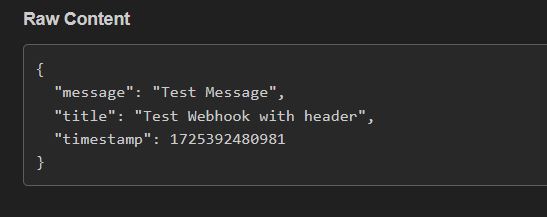
After running the workflow, to a successful completion, go back to the webhook.site page from step 2. You should see that the service received your simple webhook message from Paygate.


